Danish Butter Cookies are a classic holiday treat, beloved for their crisp exterior and soft, melt-in-your-mouth interior. These cookies are a perfect blend of buttery richness and delicate texture, making them an ideal snack for festive occasions or as a sweet gift for loved ones. Whether you’re preparing for a Christmas party or simply craving a comforting, homemade dessert, this recipe will bring the taste of Danish tradition right to your kitchen. Here’s how to make these delicious, chocolate-dipped cookies that are sure to impress!
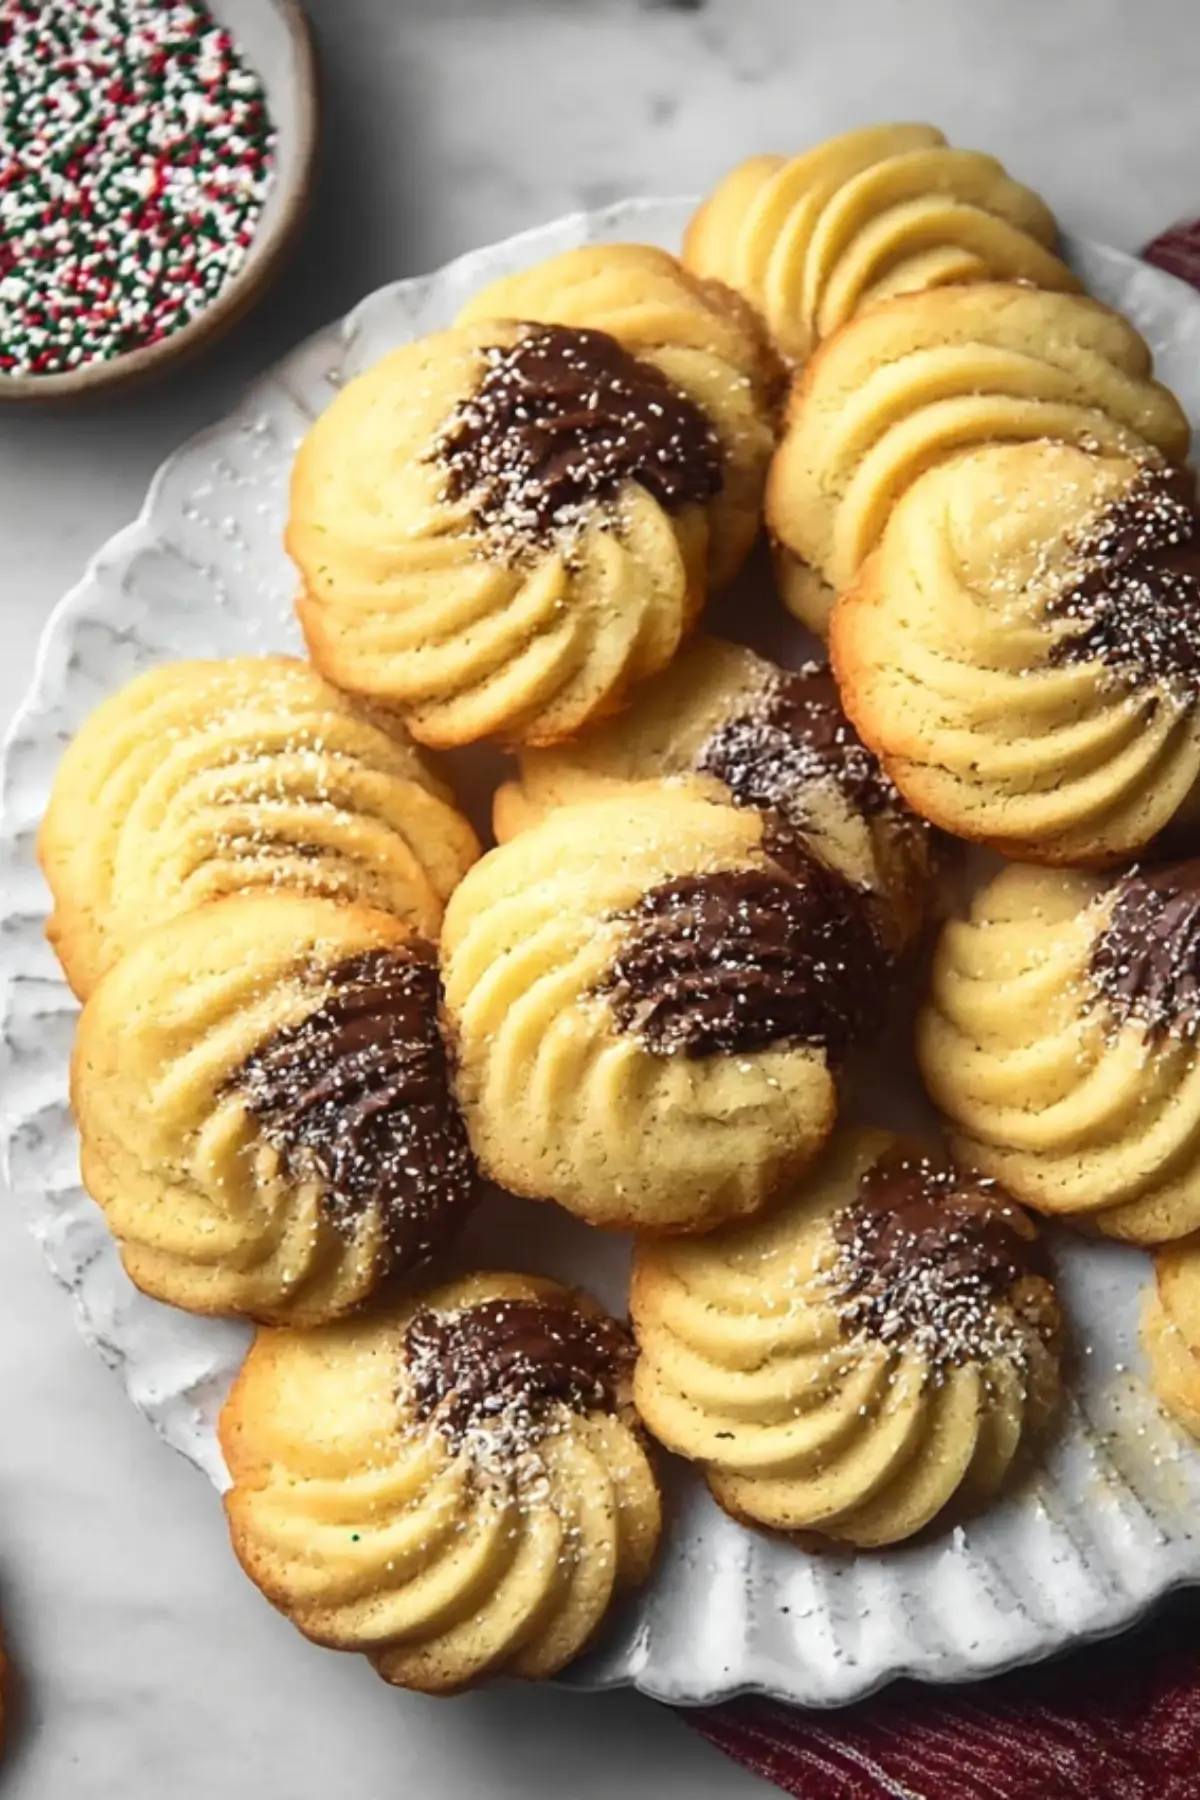
Table of Contents
Why Danish Butter Cookies are a Must-Try
Danish Butter Cookies are incredibly versatile, easy to make, and absolutely delicious. They offer a delightful combination of crispness and melt-in-your-mouth softness. Not only are they perfect for holiday gatherings, but they also work wonderfully as a treat for any occasion. The addition of melted chocolate and sprinkles makes them both visually appealing and irresistible to eat. Whether you’re baking for a family gathering or a cookie exchange, these cookies are sure to be a hit.
Ingredients for Danish Butter Cookies
To make Danish Butter Cookies, you will need the following ingredients:
- Unsalted Butter: Provides the rich, buttery flavor and smooth texture that is essential for these cookies.
- Granulated Sugar: Adds sweetness and helps achieve the perfect crispness in the cookies.
- Egg: Binds the ingredients together and adds to the soft, tender texture.
- Vanilla Extract: Enhances the flavor and adds a lovely aroma to the cookies.
- All-Purpose Flour: The main dry ingredient that gives the cookies structure and a crumbly texture.
- Salt: Balances the sweetness and intensifies the buttery flavor.
- Milk: Helps adjust the dough’s consistency to ensure it’s easy to pipe.
- Semi-Sweet or Milk Chocolate: Adds a rich, indulgent layer to the cookies when dipped.
- Sprinkles: For a fun and festive decoration that gives the cookies a colorful, holiday-ready look.
Alternative Ingredient Suggestions
If you’re looking for alternatives due to dietary preferences or ingredient availability, consider these substitutions:
- Dairy-Free: Use a plant-based butter substitute to make the cookies dairy-free.
- Gluten-Free: Swap the all-purpose flour with a gluten-free flour blend.
- Chocolate-Free: If you’re not a fan of chocolate, you can leave the cookies plain or drizzle them with a glaze instead.
Step-by-Step Instructions for Making Danish Butter Cookies
Making Danish Butter Cookies is easier than you might think. Follow these simple steps:
- Cream the Butter and Sugar: In a stand mixer or with a hand mixer, beat together 1 cup of unsalted butter and ⅔ cup of granulated sugar until light and fluffy.
- Add the Egg and Vanilla: Add 1 large egg and 1 teaspoon of vanilla extract. Mix until combined and smooth.
- Combine the Dry Ingredients: Slowly add 2 cups of all-purpose flour and ¼ teaspoon of salt. Mix on low speed until just incorporated.
- Adjust Dough Consistency: Add 2 teaspoons of milk to the dough to achieve a pipeable consistency. If needed, add a little more milk, but aim to keep the dough thick.
- Pipe the Cookies: Transfer the dough to a piping bag fitted with a large tip (Ateco 849 works well). Pipe 2-inch swirls onto a baking sheet, spacing them 3 inches apart.
- Chill the Dough: Place the baking sheet in the fridge for 15-20 minutes to allow the cookies to hold their shape while baking.
- Preheat and Bake: Preheat your oven to 350°F (175°C). Bake the cookies for about 15 minutes or until the edges are golden brown.
- Cool the Cookies: Allow the cookies to cool on the baking sheet for 10 minutes before transferring them to a wire rack to cool completely.
- Prepare the Chocolate: While the cookies are cooling, melt 3 oz of semi-sweet or milk chocolate using a double boiler or microwave.
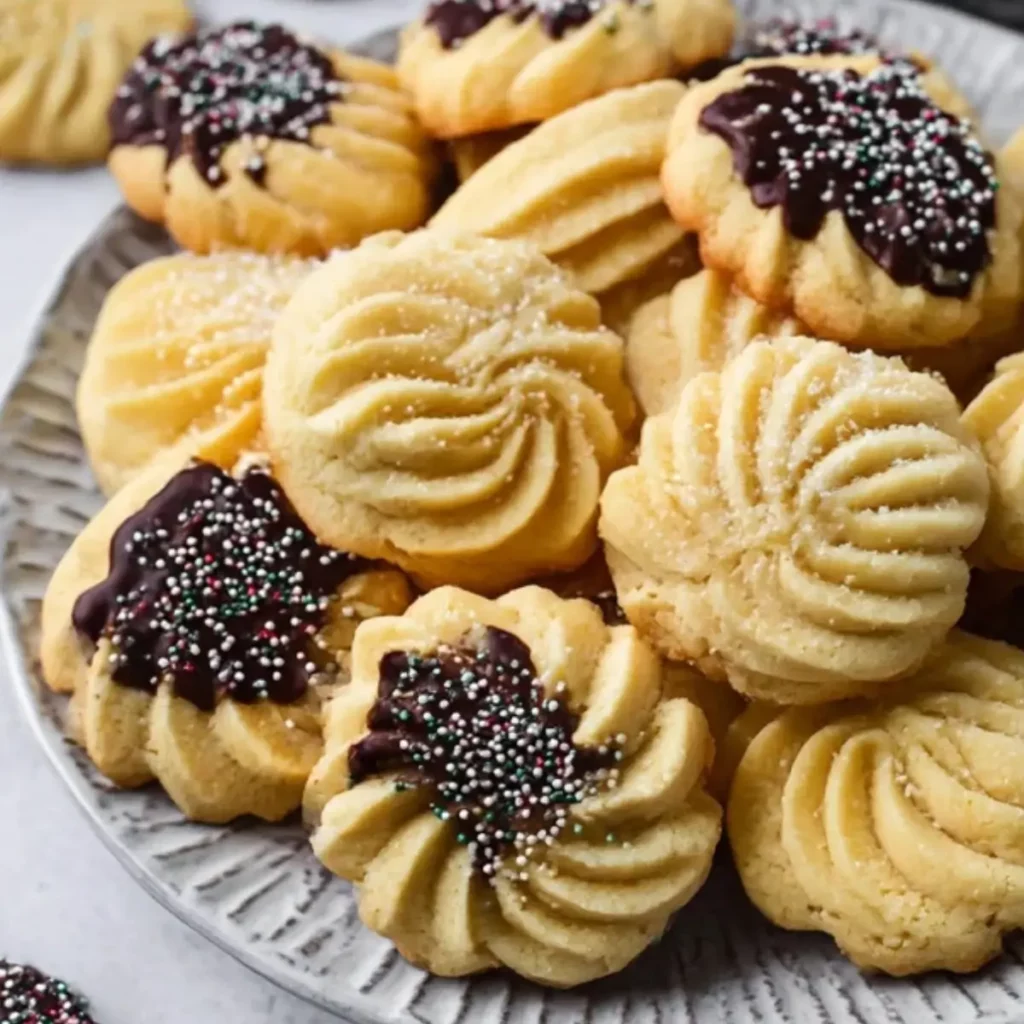
- Dip and Decorate: Dip each cookie into the melted chocolate, coating about ⅔ of the cookie. Place the dipped cookies on parchment paper and sprinkle with festive sprinkles. Let the chocolate set.
Tips & Tricks for Perfect Danish Butter Cookies
Here are a few tips to ensure your Danish Butter Cookies turn out just right:
- Piping Tip Size: Use a wide piping tip like Ateco 849 for thicker dough. A narrower tip, like Wilton 1M, may require more milk and could cause the cookies to spread too much while baking.
- Chill the Dough: Don’t skip the step of refrigerating the piped dough. This helps the cookies retain their shape and prevents them from spreading.
- Cookie Press Option: If piping is too difficult, you can use a cookie press instead. Just make sure to reduce the amount of milk in the dough to avoid spreading during baking.
- Storage: Danish Butter Cookies can be stored in an airtight container at room temperature for up to a week. They also freeze well for up to 3 months—just be sure to freeze them without the chocolate coating.
Creative Pairing Ideas and Variations
Danish Butter Cookies are delicious on their own, but you can pair them with various options to elevate the experience:
- Side Dishes: Serve these cookies with a cup of hot cocoa or your favorite tea for a cozy treat.
- Sauces: For a more indulgent touch, pair the cookies with a drizzle of caramel sauce or a scoop of vanilla ice cream.
- Make-Ahead: Prepare the cookie dough ahead of time and refrigerate it for up to 2 days before baking, or freeze the piped dough for later use.
Why Danish Butter Cookies Are the Perfect Holiday Treat
Danish Butter Cookies are the epitome of holiday baking, with their elegant appearance and irresistible flavor. Whether you’re hosting a Christmas party or looking for a thoughtful homemade gift, these cookies are sure to impress. The buttery taste, paired with the festive chocolate coating, makes these treats both indulgent and delightful. Plus, they’re easy to make and can be enjoyed throughout the holiday season.
Conclusion
Danish Butter Cookies offer a perfect blend of textures, flavors, and festive charm, making them a holiday staple that everyone will love. With just a few simple ingredients and a little time, you can create a batch of these delectable treats that will fill your home with warmth and sweetness. Whether enjoyed alone or shared with friends and family, these cookies will quickly become a favorite in your holiday repertoire. Happy baking!
Conclusion
Danish Butter Cookies are a timeless treat that captures the essence of festive baking. Their perfect balance of crispness and softness makes them a beloved holiday snack, while the chocolate-dipped finish and sprinkles add an extra touch of charm. Whether you’re baking them for a Christmas gathering, a cookie exchange, or simply to enjoy with a warm drink, these cookies never fail to delight. With simple ingredients and easy-to-follow instructions, you can bring the classic Danish cookie experience to your kitchen and share the joy with friends and family.
Frequently Asked Questions (FAQ)
How should I store Danish Butter Cookies?
Store Danish Butter Cookies in an airtight container at room temperature for up to a week. They can also be frozen for up to 3 months without the chocolate coating.
Can I use a cookie press instead of piping the dough?
Yes, you can use a cookie press for this recipe. However, the cookies will be smaller, and you’ll need to adjust the baking time slightly.
Why are my cookies spreading too much during baking?
If the cookies spread too much, it could be because the dough was too runny from too much milk, or because the dough wasn’t chilled before baking. Make sure to refrigerate the piped dough for 15-20 minutes before baking.
More Relevant Recipes
- Strawberry Kiss Cookies: These delightful cookies are a great alternative to traditional butter cookies. With a sweet, soft strawberry center, they offer a burst of flavor and a festive look perfect for holiday baking.
- Cherry Danish with Puff Pastry: If you love buttery pastries, this Cherry Danish is an ideal choice. It combines a flaky, buttery puff pastry with a sweet cherry filling, making it a perfect treat to enjoy alongside Danish Butter Cookies.
- Lemon Brownies Recipe: For a zesty twist on traditional brownies, these lemon brownies offer a soft, citrusy flavor that pairs beautifully with the rich, buttery taste of Danish Butter Cookies for a refreshing variety of holiday treats.
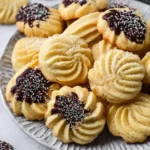
Danish Butter Cookies Recipe
- Prep Time: 20 minutes
- Cook Time: 15 minutes
- Total Time: 55 minutes
- Yield: 22 cookies 1x
- Category: Dessert
- Method: Baking
- Cuisine: American
- Diet: Vegetarian
Description
These homemade Danish Butter Cookies are crispy on the outside and soft on the inside, perfect for holiday celebrations. Dipped in chocolate and topped with sprinkles, these cookies are both delicious and festive, making them ideal for cookie exchanges or as a sweet treat during the holidays.
Ingredients
- 1 cup unsalted butter (room temperature)
- ⅔ cup granulated sugar
- 1 large egg (room temperature)
- 1 teaspoon vanilla extract
- 2 cups all-purpose flour
- ¼ teaspoon salt
- 2 teaspoons milk
- 3 oz semi-sweet or milk chocolate
- 3 tablespoons sprinkles
Instructions
- Using a stand mixer with a paddle attachment or a hand mixer, cream together 1 cup of unsalted butter and ⅔ cup of granulated sugar until the mixture is light and airy.
- Add 1 large egg and 1 teaspoon of vanilla extract, then mix until well combined.
- Gradually add 2 cups of all-purpose flour and ¼ teaspoon of salt. Mix on low speed until just combined.
- Add 2 teaspoons of milk and mix again until the dough reaches a pipeable consistency. If necessary, add a little more milk, but aim to keep the dough thick.
- Transfer the dough to a piping bag fitted with a large piping tip (Ateco 849 works well).
- Pipe 2-inch swirls onto a baking sheet, ensuring they are spaced 3 inches apart.
- Place the piped cookies in the fridge for 15-20 minutes to help them hold their shape while baking.
- Preheat the oven to 350°F (175°C). Bake the cookies for about 15 minutes or until the edges are golden brown.
- Let the cookies cool on the baking sheet for 10 minutes, then transfer them to a wire rack to cool completely.
- While the cookies are cooling, melt 3 oz of semi-sweet or milk chocolate using a double boiler or in the microwave.
- Dip ⅔ of each cookie into the melted chocolate, then place them on parchment paper. Sprinkle with festive sprinkles and allow the chocolate to set.
Notes
- If the dough is too thick and difficult to pipe, add 1-2 teaspoons of milk and mix again.
- Refrigerating the piped cookies is important to prevent spreading during baking.
- If you don’t have a large piping tip, you can use a classic Wilton 1M, but you may need to adjust the milk to prevent the dough from spreading too much.
- For a dairy-free version, substitute the butter with a plant-based butter alternative.
- If you want a gluten-free version, use a gluten-free flour blend instead of all-purpose flour.
Nutrition
- Serving Size: 1 cookie
- Calories: 148 kcal
- Sugar: 7 g
- Sodium: 31 mg
- Fat: 9 g
- Saturated Fat: 5 g
- Unsaturated Fat: 2 g
- Trans Fat: 0 g
- Carbohydrates: 16 g
- Fiber: 1 g
- Protein: 2 g
- Cholesterol: 30 mg