
Oreo Layered Dessert is a crowd-pleaser that combines the rich flavors of crushed Oreo cookies, smooth cream cheese, chocolate pudding, and a light, fluffy topping of Cool Whip. This no-bake dessert is as simple to make as it is delicious, making it perfect for any occasion. Whether you’re hosting a party, looking for a sweet treat, or simply indulging in a favorite dessert, this Oreo Layered Dessert will surely be the star of the table.
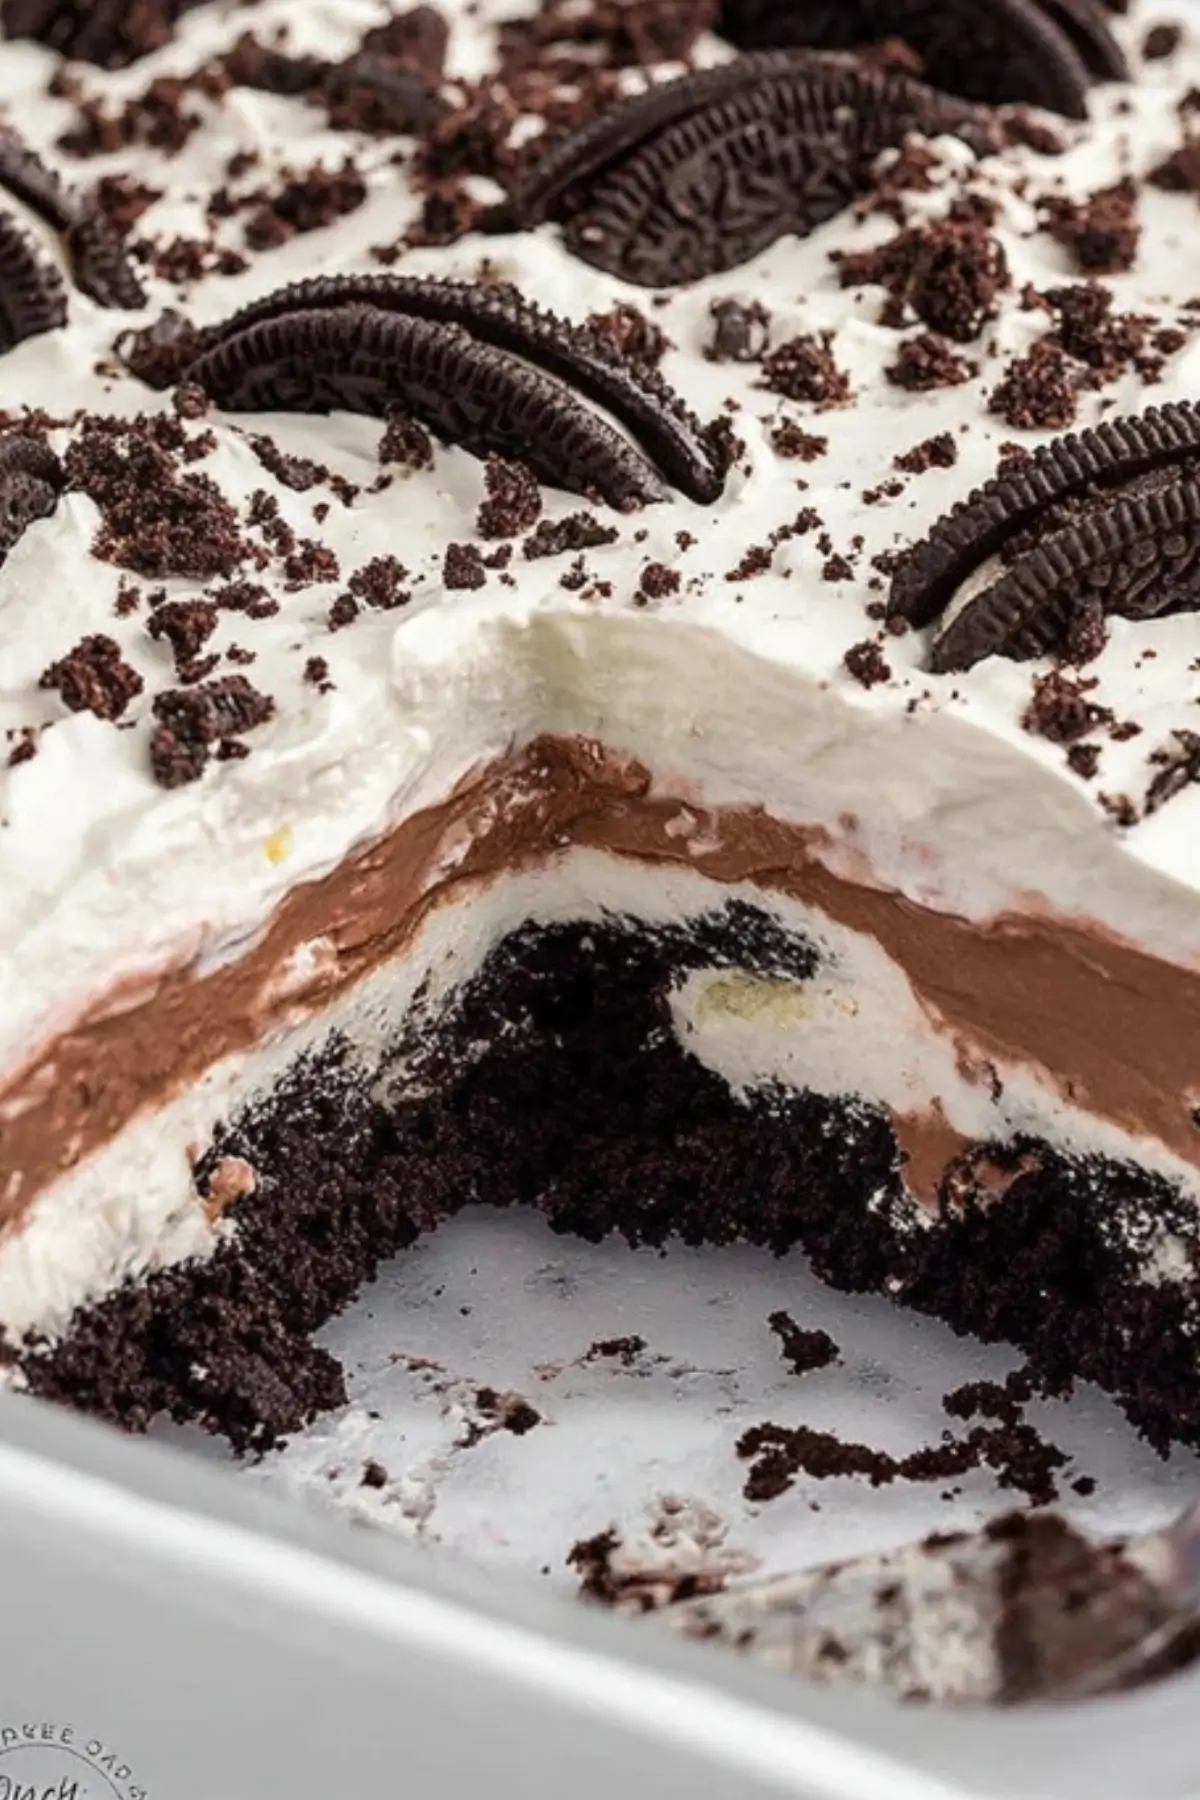
Table of Contents
Why You’ll Love This Oreo Layered Dessert
This Oreo Layered Dessert is a showstopper that is quick to prepare and bursting with creamy, decadent layers. With a simple no-bake process, it requires minimal ingredients yet delivers maximum flavor. It’s an ideal choice for anyone who loves rich desserts but wants something simple enough to throw together in no time. Plus, the different textures—from the crunchy Oreo crust to the creamy pudding layer—create a mouthwatering contrast that everyone will enjoy.
Ingredients for Oreo Layered Dessert
You will need the following ingredients to make this irresistible dessert:
• Oreo cookies: Adds the perfect amount of crunch and a chocolatey base.
• Unsalted butter: Helps bind the Oreo crumbs into a solid crust.
• Cream cheese: Offers a rich and smooth texture in the second layer.
• Confectioners’ sugar: Sweetens the cream cheese filling and gives it a velvety finish.
• Cool Whip: Provides a fluffy, creamy topping that lightens up the dessert.
• 2% milk: Used to prepare the pudding layer, adding creaminess.
• Instant chocolate pudding: Forms the indulgent middle layer with a rich, chocolaty taste.
Ingredient Alternatives for Special Diets
• Cool Whip: If you prefer homemade whipped cream or cannot find Cool Whip, simply whip up heavy cream until stiff peaks form for the topping.
• Milk: For a dairy-free version, substitute with almond milk or coconut milk.
• Oreo cookies: For a gluten-free version, try using gluten-free Oreo alternatives.
Step-by-Step Instructions to Make Oreo Layered Dessert
Creating this Oreo Layered Dessert is straightforward, and the result is a beautiful, indulgent treat. Follow these easy steps to achieve the perfect layered dessert:
- Prepare the crust: Begin by lining a 9×13-inch baking dish with parchment paper. Using a food processor, crush the Oreo cookies into fine crumbs. Reserve ¾ cup of the crushed cookies for the topping. Combine the remaining Oreo crumbs with melted butter and press into the bottom of the prepared dish. Place the dish in the freezer to set.
- Make the cream cheese layer: In a mixing bowl, beat the softened cream cheese and confectioners’ sugar until smooth. Add one tub of Cool Whip to the cream cheese mixture and beat for another 30 seconds, taking care not to overbeat. Spread this mixture evenly over the Oreo crust. Place the dish back in the freezer while you prepare the next layer.
- Prepare the pudding layer: In a clean bowl, beat together the 2½ cups of milk and the two packages of instant chocolate pudding for about two minutes. Once thickened, spread this pudding layer evenly over the cream cheese layer.
- Top with Cool Whip: Add the remaining Cool Whip on top of the pudding layer and spread it evenly. Finally, sprinkle the reserved Oreo crumbs over the top for an extra crunch and beautiful presentation.
- Chill and Serve: Refrigerate the dessert for at least six hours (overnight for the best results) to allow the layers to set. Once chilled, cut into squares and serve!

Tips & Tricks for the Perfect Oreo Layered Dessert
• Allow the layers to set: For the best results, give the dessert enough time to chill in the fridge. This helps the layers set properly, making it easier to slice and serve.
• Don’t over-mix: When preparing the cream cheese layer, avoid over-beating the mixture. This can cause it to become too thin or lose its texture.
• Texture check: If you want a thicker pudding layer, add an extra package of instant pudding. This will give the dessert more structure and make it easier to cut.
Pairing Ideas and Variations for Oreo Layered Dessert
Oreo Layered Dessert can be served in so many ways to complement different tastes. For example:
• Pair with coffee: A rich cup of coffee pairs beautifully with the sweet, creamy layers of this dessert, balancing its sweetness.
• Try different flavors: If you’re craving variety, consider swapping the chocolate pudding for vanilla pudding or even strawberry-flavored pudding for a fruity twist.
• Serve with fruit: Adding fresh berries on top of each serving brings a fresh contrast to the creamy, rich dessert.
Storage Tips
• In the fridge: Keep any leftovers in an airtight container in the refrigerator for up to five days.
• In the freezer: You can also freeze individual portions for up to three months. Simply thaw in the refrigerator before serving.
Health Benefits and Special Considerations
While this Oreo Layered Dessert is undoubtedly indulgent, it’s also a versatile treat. By making simple swaps—like using low-fat milk or sugar-free pudding—you can reduce some of the richness and cater to various dietary preferences. The chocolate pudding offers some antioxidants, while the cream cheese adds a small amount of protein, making this dessert a treat you can enjoy without too much guilt.
This Oreo Layered Dessert is the ideal treat for any occasion. Whether you’re hosting a family gathering, looking for a simple yet impressive dessert for a party, or just want to indulge in something sweet, this no-bake dessert is sure to impress.
Conclusion
Oreo Layered Dessert is the perfect combination of rich, creamy, and crunchy textures that make every bite a heavenly experience. With minimal effort, you can create a dessert that’s guaranteed to impress guests and satisfy your sweet tooth. Whether you’re hosting a special event, planning a casual family dinner, or simply in the mood for something indulgent, this no-bake dessert is the way to go. Its layers of Oreo cookies, creamy filling, and chocolate pudding ensure a delightful treat that everyone will love.
Don’t hesitate to get creative with this dessert—try variations like different pudding flavors or toppings for a personalized twist. And with tips on making it ahead of time and storing leftovers, you’ll have the convenience of an easy-to-prepare yet impressive dessert all week long. Make your next dessert experience unforgettable with this simple, crowd-pleasing Oreo Layered Dessert!
Frequently Asked Questions (FAQs)
Can I make Oreo Layered Dessert ahead of time?
Yes, it’s highly recommended to prepare the Oreo Layered Dessert the day before you plan to serve it. This gives the layers enough time to set and meld together, making it easier to cut and ensuring better flavor.
Can I substitute Cool Whip in this recipe?
If you can’t find Cool Whip, you can substitute it with homemade whipped cream. Simply whip cold heavy cream until stiff peaks form. This will give the dessert a similar light, airy texture.
How do I store leftovers of Oreo Layered Dessert?
You can store any leftovers of the Oreo Layered Dessert in an airtight container in the refrigerator for up to five days. If you’d like to store it longer, you can freeze individual portions in small airtight containers for up to three months. Just thaw in the refrigerator before serving.
More Relevant Recipes
- No-Bake Lemon Eclair Cake: A Refreshing Dessert: This no-bake dessert is a fantastic alternative to the Oreo Layered Dessert, featuring layers of graham crackers, vanilla pudding, and a tangy lemon topping. It offers a light, refreshing flavor that balances the richness of the Oreo dessert, making it a great option for warm weather or a lighter treat.
- No-Bake Summer Berry Icebox Cake: A delicious and easy-to-make cake that features fresh berries, whipped cream, and layers of graham crackers, similar in texture to the Oreo Layered Dessert. This dessert brings a fruity twist, offering a vibrant and tangy flavor while keeping things cool and refreshing.
- Strawberry Cheesecake Sushi Roll: For a unique twist on cheesecake, these strawberry cheesecake sushi rolls are perfect for fans of creamy desserts. With a similar texture to the Oreo Layered Dessert, they are filled with a sweet, tangy cream cheese filling and topped with fresh strawberries, providing a fun and innovative dessert option.

Oreo Layered Dessert Recipe
- Prep Time: 20 minutes
- Cook Time: 0 minutes
- Total Time: 6 hours (chill time)
- Yield: 12 servings 1x
- Category: Dessert
- Method: No-bake
- Cuisine: American
- Diet: Vegetarian
Description
Oreo Layered Dessert is a no-bake, decadent treat made of Oreo cookies, cream cheese, chocolate pudding, and Cool Whip. It’s perfect for any occasion and requires minimal effort to make, making it a crowd-pleaser for parties or casual gatherings.
Ingredients
- 50 Oreo cookies
- ½ cup unsalted butter, melted
- 1 (8-ounce) package cream cheese, softened
- 1 cup confectioners’ sugar
- 2 (8-ounce) containers Cool Whip
- 2½ cups 2% milk
- 2 (3.4-ounce) packages instant chocolate pudding
Instructions
- Line a 9×13-inch baking dish with parchment paper.
- Crush the Oreo cookies using a food processor and set aside ¾ cup of crumbs for topping.
- Mix the crushed Oreos with melted butter and press into the bottom of the prepared dish. Place in the freezer.
- Beat cream cheese and confectioners’ sugar until smooth. Add 1 tub of Cool Whip and mix until combined.
- Spread the cream cheese mixture over the Oreo crust and return to the freezer.
- In a separate bowl, mix the milk and chocolate pudding mix for 2 minutes. Spread evenly over the cream cheese layer.
- Top with the second tub of Cool Whip and sprinkle with the reserved Oreo crumbs.
- Chill the dessert for at least six hours or overnight before serving.
Notes
- For best results, refrigerate overnight to allow the layers to set properly.
- Feel free to substitute Cool Whip with homemade whipped cream for a fresh option.
- Use any milk you prefer, but 2% provides the best consistency for the pudding layer.
Nutrition
- Serving Size: 1 square (1/12th of recipe)
- Calories: 273 kcal
- Sugar: 25g
- Sodium: 267mg
- Fat: 13g
- Saturated Fat: 7g
- Unsaturated Fat: 5g
- Trans Fat: 0.2g
- Carbohydrates: 36g
- Fiber: 1g
- Protein: 3g
- Cholesterol: 25mg