Red Velvet Poke Cake is a dreamy, vibrant dessert that combines the richness of red velvet cake with the creaminess of cheesecake pudding and the satisfying crunch of crushed Oreos. This cake is perfect for Valentine’s Day, potlucks, or any time you’re craving something decadent yet easy to make. With its striking red hue, creamy layers, and irresistible topping, this Red Velvet Poke Cake is bound to become your go-to dessert for special occasions and weeknight treats alike.
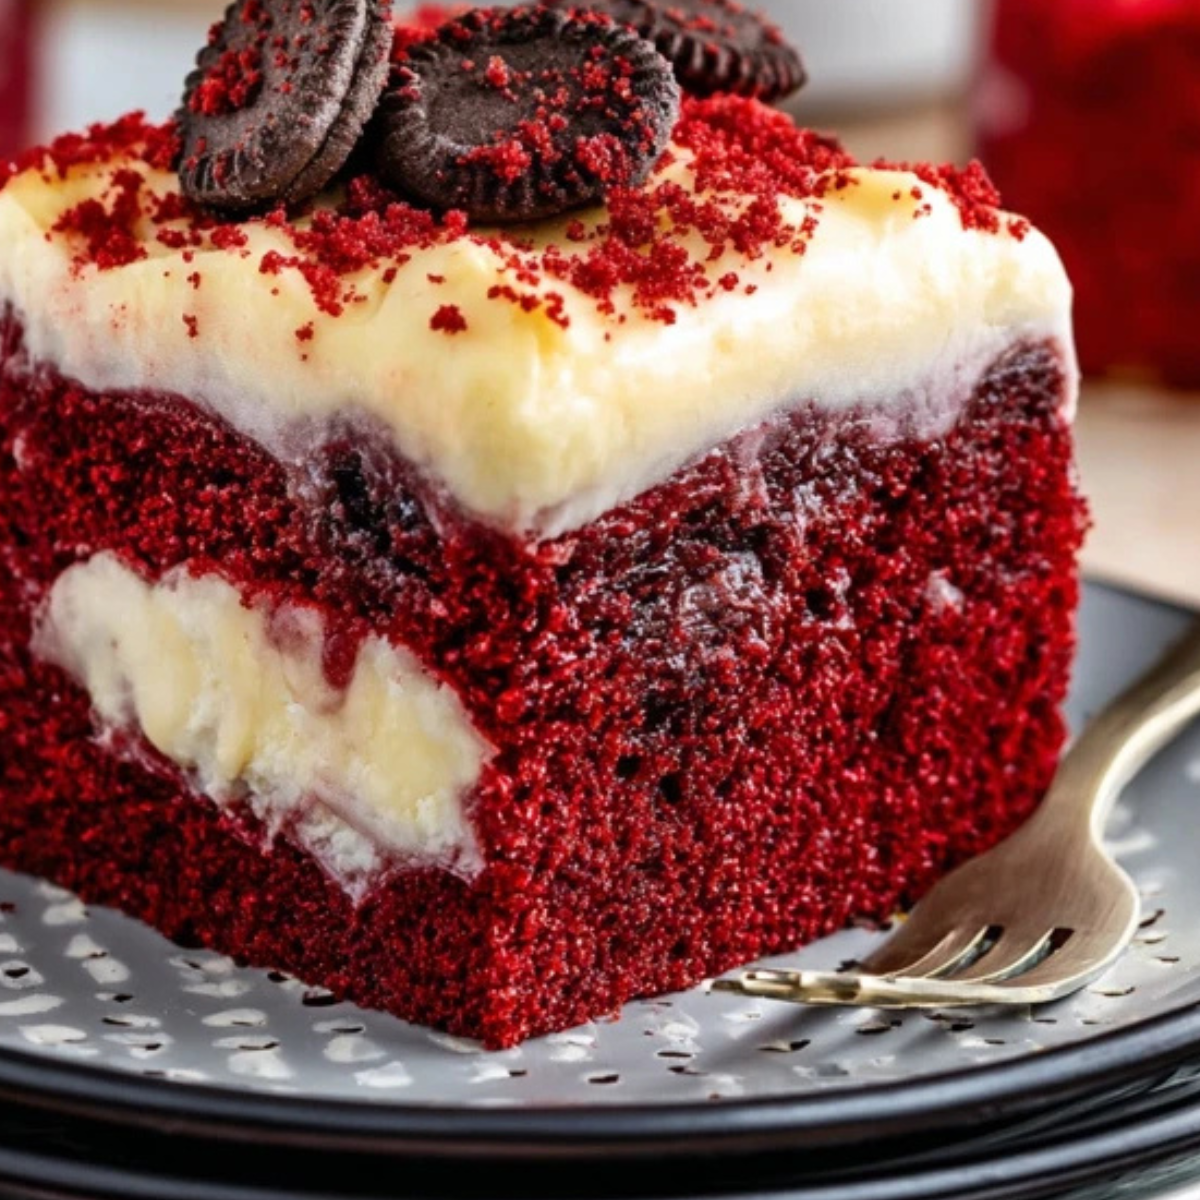
Table of Contents
What Makes This Red Velvet Poke Cake Irresistible
This Red Velvet Poke Cake is more than just a pretty treat—it’s incredibly simple to prepare and delivers maximum flavor with minimal effort. Using a boxed red velvet cake mix as the base keeps things quick and easy, while the cheesecake pudding filling adds a rich and velvety texture. Topped with fluffy whipped cream and crushed Oreos, each bite offers a perfect balance of sweet, creamy, and crunchy textures. Plus, it’s make-ahead friendly, making it ideal for stress-free entertaining.
Must-Have Ingredients for the Best Red Velvet Poke Cake
• Red Velvet Cake Mix: Forms the moist, tender base of the dessert and gives it that iconic deep red color.
• Eggs, Oil & Water: Required to prepare the cake mix; follow the specific instructions on your box for best results.
• Instant Cheesecake Pudding Mix: Adds a luscious, creamy layer that seeps into the cake holes, enhancing the flavor and moisture.
• Milk: Used to prepare the pudding; whole or 2% milk ensures a rich, smooth consistency.
• Whipped Topping (Cool Whip): Provides a light, airy contrast to the dense cake and pudding.
• Oreo Cookies: Crushed on top for crunch, texture, and an extra layer of chocolatey goodness.
Smart Ingredient Swaps You Can Try
• Cake Mix: Homemade red velvet cake batter can be used instead of boxed for a more personalized touch.
• Pudding Flavor: Try vanilla or white chocolate pudding if cheesecake isn’t available.
• Whipped Topping: Swap Cool Whip with stabilized homemade whipped cream for a fresher flavor, keeping in mind it may not hold up as long.
• Oreo Cookies: Replace with mini chocolate chips, white chocolate shavings, or red velvet cake crumbs for variety.
Easy-to-Follow Steps for Red Velvet Poke Cake Success
- Bake the Cake: Prepare the red velvet cake mix as directed on the box using the specified amounts of eggs, oil, and water. Bake in a 9×13-inch pan.
- Poke the Cake: Once slightly cooled (a few minutes after baking), use the handle of a wooden spoon or a similar tool to poke large holes all over the cake. Poke all the way down to the bottom.
- Make the Pudding: In a bowl, whisk the cheesecake pudding mix with 4 cups of milk until smooth and lump-free.
- Pour & Press: Pour the pudding over the cake, aiming for the holes. Use the back of a spoon to press the pudding into the holes gently.
- Chill to Set: Place the cake in the fridge for at least 2 hours to allow the pudding to set and the cake to chill.
- Add the Whipped Topping: Once chilled, spread the whipped topping evenly over the cake.
- Crush & Sprinkle Oreos: Place the Oreos in a zip-top bag and crush them with a rolling pin, leaving some bigger chunks. Sprinkle generously over the top.
- Serve & Enjoy: Slice and serve this Red Velvet Poke Cake chilled for best texture and flavor.
Pro Tips to Perfect Your Red Velvet Poke Cake
• Don’t skip the chilling time — the pudding needs time to absorb and set into the cake.
• Use large holes when poking the cake so the pudding can really soak in.
• Wait to add Oreos until just before serving to prevent them from becoming soggy.
• Keep it covered in the fridge to prevent absorption of other odors.
• Store properly in an airtight container for up to 4 days in the refrigerator.
Fun Variations and Serving Suggestions
• Spicy Twist: Add a dash of cinnamon or cayenne to the cake mix for a bold flavor boost.
• Gluten-Free Version: Use a gluten-free red velvet cake mix and certified gluten-free cookies for topping.
• Holiday Edition: Sprinkle red, white, and pink candy on top for Valentine’s Day, or green and red sprinkles for Christmas.
• Serve with Berries: A side of strawberries or raspberries balances the richness beautifully.
• Make-Ahead Friendly: Prepare a day in advance and chill overnight, just wait to top with cookies before serving.
Why Red Velvet Poke Cake is a Crowd Favorite
This Red Velvet Poke Cake is more than just another dessert—it’s a conversation starter, a potluck hero, and a Valentine’s Day favorite. The contrast of textures, from the ultra-moist cake to the fluffy whipped topping and crispy cookie crumbles, makes each bite exciting. Whether you’re celebrating something special or simply satisfying a sweet craving, this cake’s visual appeal and flavor-packed layers make it unforgettable.
Wrapping It Up: Why You’ll Love Making Red Velvet Poke Cake
If you’re in search of a dessert that’s visually stunning, incredibly indulgent, and surprisingly easy to prepare, Red Velvet Poke Cake checks all the boxes. Its luscious layers of moist cake, silky cheesecake pudding, fluffy whipped topping, and crunchy Oreos make every slice irresistible. Whether it’s for a holiday, birthday, or “just because” moment, this cake delivers on both taste and texture. Plus, it’s beginner-friendly and a guaranteed showstopper. Don’t be surprised if this becomes your most requested dessert!
Frequently Asked Questions About Red Velvet Poke Cake
Can I make Red Velvet Poke Cake ahead of time?
Absolutely. In fact, letting the cake chill overnight allows the pudding layer to soak in fully, making the cake even more flavorful and moist. Just wait to add the crushed Oreos until you’re ready to serve to keep them crisp.
What if I don’t have cheesecake pudding mix?
No problem! You can substitute with vanilla or white chocolate instant pudding. Both will still offer a creamy, smooth filling that complements the red velvet base beautifully.
How should I store leftovers?
Store any leftover Red Velvet Poke Cake in the refrigerator, covered with plastic wrap or in an airtight container. It will stay fresh for up to 4 days. Avoid leaving it at room temperature due to the dairy-based pudding and whipped topping.
Can I freeze Red Velvet Poke Cake?
Yes, this cake can be frozen. However, be aware that the texture of the pudding and whipped topping may change slightly upon thawing. For best results, freeze the cake without the whipped topping and Oreos, then add those after thawing.
More Relevant Recipes
- Bunuelos Recipe – Easy & Crispy Mexican Treat
- Cherry Thumbprint Cookies – Simple & Delicious
- Chocolate Raspberry Cupcakes – Irresistibly Sweet & Moist

Red Velvet Poke Cake
- Prep Time: 15 minutes
- Cook Time: 30 minutes
- Total Time: 2 hours 45 minutes (includes chilling)
- Yield: 12 servings 1x
- Category: Dessert
- Method: Baking
- Cuisine: American
- Diet: Vegetarian
Description
This Red Velvet Poke Cake is a moist red velvet cake soaked with creamy cheesecake pudding, topped with fluffy whipped topping and crunchy crushed Oreos. Perfect for holidays, gatherings, or any time you want a simple yet indulgent dessert.
Ingredients
- 1 box red velvet cake mix
- 3 large eggs (as required by cake mix)
- 1/2 cup vegetable oil (or as directed on box)
- 1 1/4 cups water (or as directed on box)
- 2 (3.4 oz) boxes instant cheesecake pudding mix
- 4 cups milk (preferably whole or 2%)
- 1 (8 oz) tub whipped topping (Cool Whip), thawed
- 10 Oreo cookies, crushed
Instructions
- Preheat oven and prepare the red velvet cake mix according to package directions, using the eggs, oil, and water listed on the box. Pour batter into a 9×13-inch baking pan and bake as instructed.
- Once the cake is done baking, allow it to cool for about 2–3 minutes.
- Using the handle of a wooden spoon or a similar object, poke large holes all over the warm cake, going all the way to the bottom.
- In a mixing bowl, whisk together the cheesecake pudding mix and 4 cups of milk until smooth and lump-free.
- Slowly pour the pudding over the cake, making sure to fill the holes. Use the back of a spoon to press the pudding into the holes.
- Refrigerate the cake for at least 2 hours to allow it to set and chill.
- Once chilled, spread the thawed whipped topping evenly over the pudding layer.
- Crush the Oreo cookies (leaving some larger chunks for texture) and sprinkle them evenly over the whipped topping just before serving.
- Slice and serve chilled. Enjoy!
Notes
- Wait to add the crushed Oreos until just before serving to keep them crunchy.
- You can substitute vanilla or white chocolate pudding for the cheesecake flavor.
- Use milk instead of water and melted butter instead of oil in the cake mix for a richer flavor.
- Store leftovers in the refrigerator for up to 4 days in an airtight container.
- This cake can be made a day in advance for better flavor development.
Nutrition
- Serving Size: 1 slice
- Calories: 306
- Sugar: 26g
- Sodium: 404mg
- Fat: 13g
- Saturated Fat: 4g
- Unsaturated Fat: 7g
- Trans Fat: 0g
- Carbohydrates: 41g
- Fiber: 1g
- Protein: 7g
- Cholesterol: 35mg