There’s something magical about baking Easter Bunny Rolls, especially when they bring both charm and flavor to your holiday table. These adorable, soft bread rolls are not only a visual delight but also incredibly easy to make, making them perfect for family gatherings, spring brunches, or festive dinners. Whether you’re hosting an Easter celebration or simply want to create something fun and delicious, Easter Bunny Rolls offer the perfect combination of fluffy texture, buttery flavor, and playful presentation.
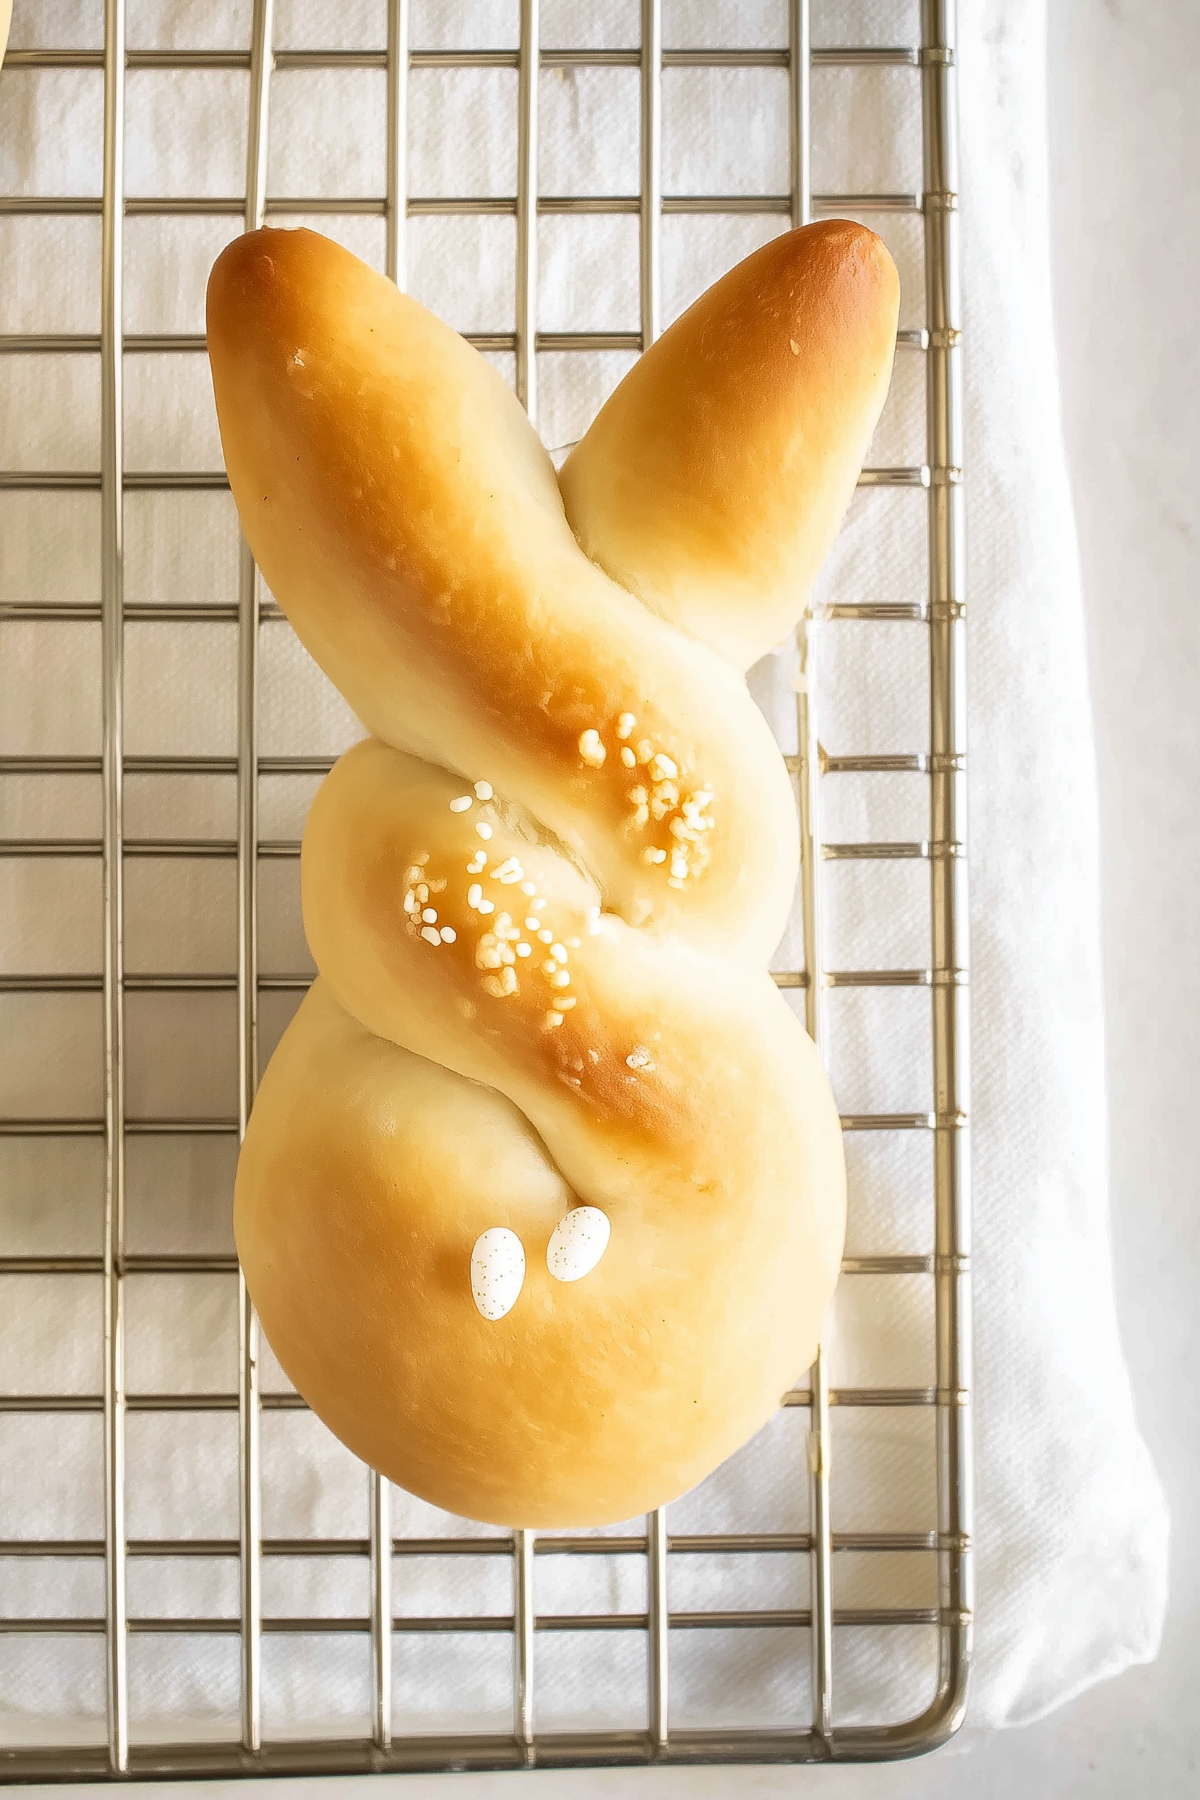
Table of Contents
Why You’ll Love These Easter Bunny Rolls
Easter Bunny Rolls are more than just a cute addition to your table—they’re a practical and versatile recipe that anyone can master. These homemade bread rolls are soft on the inside with a lightly golden crust, making them ideal for pairing with both sweet and savory dishes.
They are beginner-friendly, requiring simple ingredients and straightforward steps. The dough is easy to handle, and shaping the bunny design is surprisingly fun, even for kids. These rolls also bake quickly, making them perfect if you’re short on time but still want a homemade touch.
Another great advantage is their versatility. Easter Bunny Rolls can be served as dinner rolls, brunch bread, or even as a base for mini sandwiches. Their light and fluffy texture makes them a crowd favorite, while their festive look makes them a centerpiece-worthy dish.
Ingredients for Easter Bunny Rolls
• All-purpose flour: Provides structure and gives the rolls their soft, fluffy texture
• Active dry yeast: Helps the dough rise and creates airy bread rolls
• Warm milk: Activates the yeast and adds richness to the dough
• Sugar: Adds a subtle sweetness and feeds the yeast
• Butter: Enhances flavor and keeps the rolls soft and tender
• Eggs: Contribute to structure and give the rolls a rich texture
• Salt: Balances flavors and strengthens the dough
• Water: Helps bring the dough together and ensures proper hydration
Ingredient Substitutions and Variations
If you want to adapt your Easter Bunny Rolls, there are several easy substitutions you can try. For a dairy-free version, replace milk with almond milk or oat milk and use plant-based butter. If you prefer whole grain bread, swap part of the all-purpose flour with whole wheat flour, though this may make the rolls slightly denser.
For a sweeter variation, you can add a touch of honey or vanilla extract to the dough. If you’re aiming for a savory twist, sprinkle herbs like rosemary or thyme into the dough to create herb-infused Easter Bunny Rolls.
Step-by-Step Instructions for Easter Bunny Rolls
- Begin by activating the yeast. In a bowl, combine warm milk, sugar, and yeast. Let it sit for about 5–10 minutes until it becomes foamy. This step ensures your Easter Bunny Rolls will rise properly.
- In a large mixing bowl, combine flour and salt. Add the yeast mixture, melted butter, and eggs. Mix until a soft dough forms.
- Knead the dough for about 8–10 minutes until it becomes smooth and elastic. If the dough feels sticky, add a small amount of flour gradually.
- Place the dough in a lightly greased bowl, cover it, and let it rise in a warm place for about 1–1.5 hours or until doubled in size.
- Once risen, punch down the dough and divide it into small portions. Roll each portion into ropes and shape them into bunny forms by twisting or looping to create ears and a body.
- Arrange the shaped Easter Bunny Rolls on a lined baking sheet, leaving space between each piece. Cover and let them rise again for about 20–30 minutes.
- Preheat your oven to 350°F (175°C). Brush the rolls lightly with milk or egg wash for a golden finish.
- Bake for 12–15 minutes or until the rolls are lightly golden brown on top.
- Remove from the oven and let them cool slightly before serving. Enjoy your freshly baked Easter Bunny Rolls warm for the best texture and flavor.
Tips and Tricks for Perfect Easter Bunny Rolls
To achieve the best results, always ensure your yeast is fresh and properly activated. If the yeast doesn’t foam, your Easter Bunny Rolls may not rise correctly. Keep your liquids warm but not too hot, as excessive heat can kill the yeast.
When kneading, aim for a soft and slightly tacky dough rather than a dry one. Over-flouring can lead to dense rolls instead of light and fluffy ones. If you’re shaping the bunnies for the first time, keep the designs simple—basic loops and twists still create an adorable effect.
For extra softness, brush the baked Easter Bunny Rolls with melted butter right after they come out of the oven. This also adds a beautiful shine and enhances flavor.
Store leftover rolls in an airtight container at room temperature for up to two days. You can also freeze them and reheat gently in the oven when needed.
Pairing Ideas and Creative Variations
Easter Bunny Rolls pair beautifully with a variety of dishes, making them a versatile addition to your holiday menu. Serve them alongside roasted meats, creamy soups, or fresh spring salads. They also work well with spreads like butter, jam, or honey for a sweeter option.
For a fun variation, turn your Easter Bunny Rolls into mini sandwiches by slicing them and adding fillings like ham, cheese, or egg salad. This makes them perfect for brunch or casual gatherings.
You can also experiment with toppings. Sprinkle sesame seeds or poppy seeds before baking for added texture. For a festive touch, use raisins or olives to create bunny eyes.
If you want to prepare ahead, you can shape the rolls the night before and refrigerate them. Let them come to room temperature before baking the next day for fresh, warm Easter Bunny Rolls without the extra effort.
The Charm of Baking Easter Bunny Rolls at Home
Baking Easter Bunny Rolls is not just about the end result—it’s about the experience. From kneading the dough to shaping each bunny, the process brings a sense of creativity and joy to your kitchen. It’s a wonderful activity to share with family, especially during the Easter season.
These rolls capture the essence of spring baking: light, cheerful, and full of warmth. Their soft texture and delightful appearance make them a memorable addition to any celebration. Whether you’re an experienced baker or just starting out, Easter Bunny Rolls are a recipe worth trying.
With their irresistible combination of taste, texture, and visual appeal, Easter Bunny Rolls are sure to become a holiday tradition you’ll look forward to every year.
Conclusion
Easter Bunny Rolls are the perfect combination of creativity, flavor, and festive charm. These soft, fluffy bread rolls bring a playful touch to your Easter table while remaining simple enough for any home baker to master. From their light, airy texture to their adorable bunny shapes, Easter Bunny Rolls are guaranteed to impress both kids and adults alike.
What makes Easter Bunny Rolls truly special is their versatility. You can serve them as a side dish, transform them into mini sandwiches, or enjoy them with sweet spreads for a delightful treat. With easy-to-find ingredients and flexible preparation options, this recipe fits seamlessly into any Easter celebration or spring gathering.
By following the step-by-step process and tips shared above, you’ll consistently achieve bakery-quality Easter Bunny Rolls at home. Whether you’re baking them for a holiday feast or a fun family activity, these rolls are sure to become a cherished tradition year after year.
Frequently Asked Questions About Easter Bunny Rolls
Can I make Easter Bunny Rolls ahead of time?
Yes, Easter Bunny Rolls can be prepared in advance. You can shape the rolls and store them in the refrigerator overnight. Before baking, allow them to come to room temperature and complete their second rise. This method helps save time on busy holiday mornings.
Why didn’t my Easter Bunny Rolls rise properly?
If your Easter Bunny Rolls didn’t rise well, the yeast may have been inactive or the liquid used was too hot or too cold. Always ensure the yeast is fresh and that the liquid temperature is warm (not hot) to activate it properly.
Can I freeze Easter Bunny Rolls?
Absolutely. Easter Bunny Rolls freeze very well. Once baked and cooled, store them in an airtight container or freezer bag. When ready to serve, reheat them in the oven at a low temperature until warm and soft again.
More Relevant Recipes
Print
Easy Easter Bunny Rolls
- Prep Time: 20 minutes
- Cook Time: 15 minutes
- Total Time: 1 hour 50 minutes
- Yield: 10–12 rolls 1x
- Category: Bread
- Method: Baking
- Cuisine: American
Description
Easter Bunny Rolls are soft, fluffy homemade bread rolls shaped like adorable bunnies. Perfect for Easter brunch or dinner, these festive rolls are easy to make, lightly buttery, and ideal for both sweet and savory pairings.
Ingredients
- 3 1/2 cups all-purpose flour
- 2 1/4 teaspoons active dry yeast (1 packet)
- 1 cup warm milk (about 110°F / 45°C)
- 1/4 cup granulated sugar
- 1/4 cup unsalted butter, melted
- 2 large eggs
- 1 teaspoon salt
- 2 tablespoons water (as needed for dough consistency)
- 1 egg yolk + 1 tablespoon milk (for egg wash)
Instructions
- In a small bowl, combine warm milk, sugar, and yeast. Let sit for 5–10 minutes until foamy.
- In a large mixing bowl, combine flour and salt. Add the yeast mixture, melted butter, and eggs. Mix until a soft dough forms.
- Knead the dough on a floured surface for 8–10 minutes until smooth and elastic.
- Place the dough in a greased bowl, cover, and let rise in a warm place for 1–1.5 hours or until doubled in size.
- Punch down the dough and divide into 10–12 equal portions.
- Roll each piece into ropes and shape into bunny forms by twisting to create ears and a body.
- Place shaped rolls on a lined baking sheet, cover, and let rise again for 20–30 minutes.
- Preheat oven to 350°F (175°C).
- Brush rolls with egg wash for a golden finish.
- Bake for 12–15 minutes or until golden brown.
- Remove from oven and brush with melted butter if desired. Serve warm.
Notes
- Ensure yeast is fresh and properly activated for best rise.
- Do not overheat the milk, as it can kill the yeast.
- Knead until the dough is soft and slightly tacky, not dry.
- You can prepare and shape the rolls ahead, then refrigerate overnight.
- Brush with butter after baking for extra softness and flavor.
- Store leftovers in an airtight container for up to 2 days or freeze for longer storage.
Nutrition
- Serving Size: 1 roll
- Calories: 180
- Sugar: 5g
- Sodium: 150mg
- Fat: 5g
- Saturated Fat: 3g
- Unsaturated Fat: 2g
- Trans Fat: 0g
- Carbohydrates: 28g
- Fiber: 1g
- Protein: 5g
- Cholesterol: 35mg