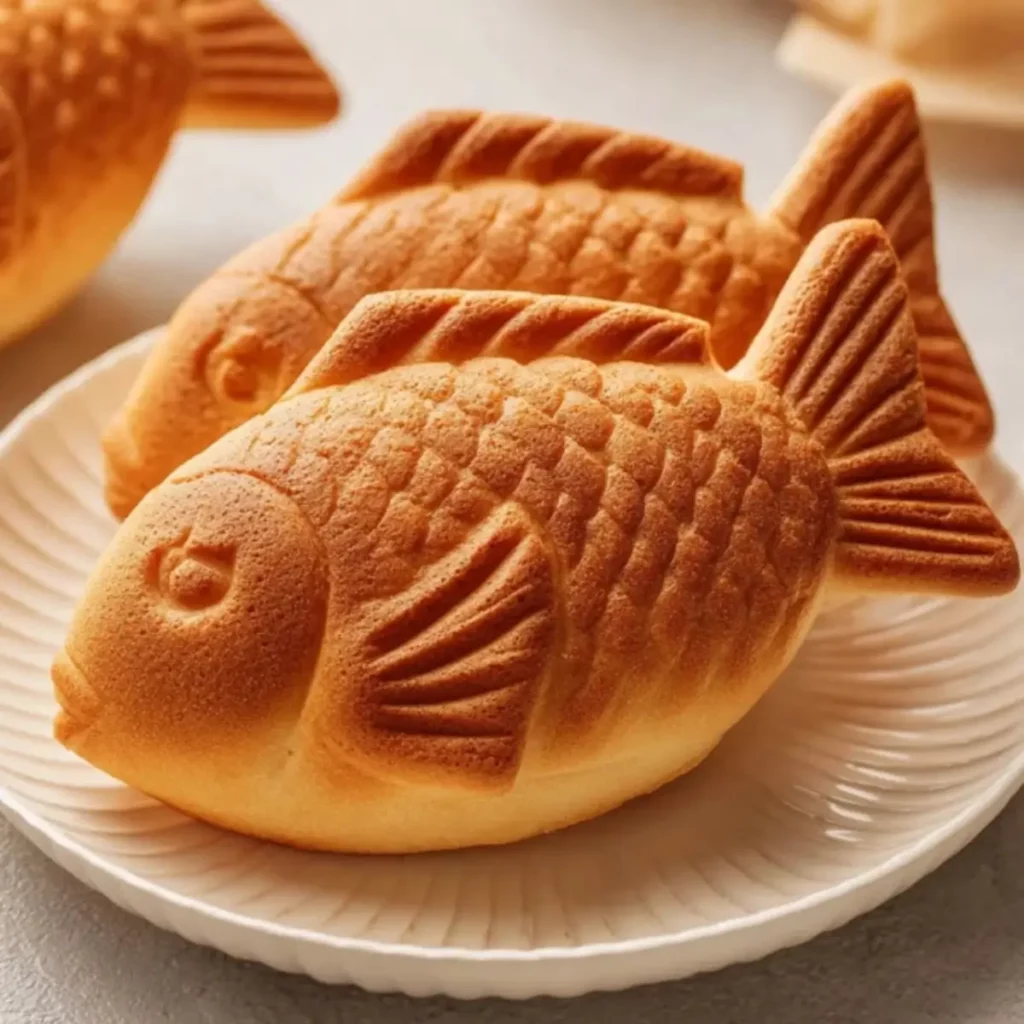
Taiyaki, pronounced “tie-yah-kee,” is a delightful Japanese fish-shaped dessert that has become a beloved street food across Japan. With its crispy golden exterior and soft, tender interior filled with sweet fillings like red bean paste, custard, or chocolate, Taiyaki offers an irresistible treat. Whether you’re looking to indulge in a sweet snack or explore more Japanese desserts, this Taiyaki recipe is a must-try for its simplicity, delicious flavors, and fun presentation.
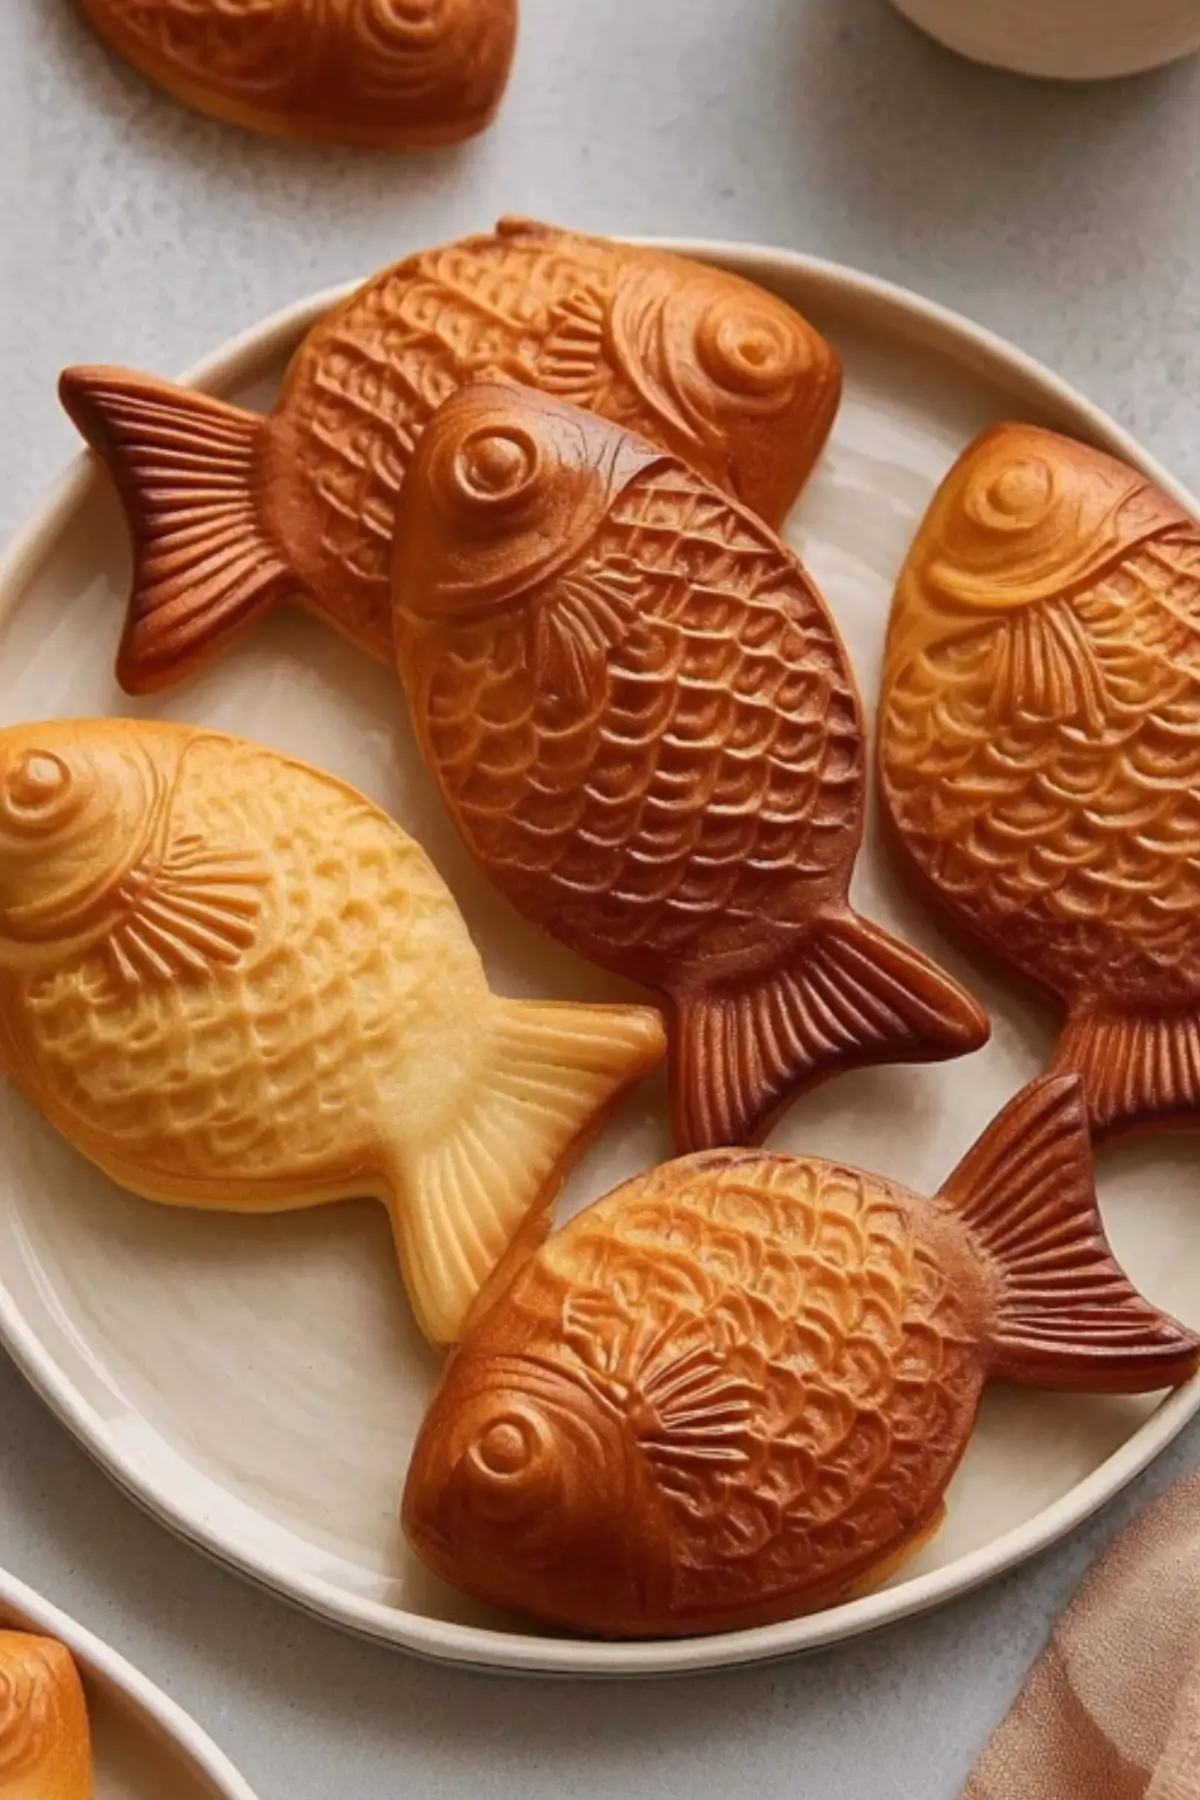
Table of Contents
Why You’ll Love Taiyaki
If you’ve never tried Taiyaki before, you’re in for a treat. This Japanese pastry is not only visually charming with its fish shape but also bursting with flavor. Taiyaki is crispy on the outside and wonderfully soft and fluffy on the inside, making it a delightful contrast in textures. You can easily customize the filling to your preference—whether you opt for the classic red bean paste or indulge in Nutella or vanilla custard. Taiyaki is also easy to make, requiring just a few pantry staples and simple steps. It’s perfect for family gatherings or as a fun baking project for the weekend.
Ingredients
Making Taiyaki requires simple ingredients that you likely already have in your kitchen. Here’s what you’ll need:
• Cake Flour: This creates a soft, tender structure for the pastry.
• Granulated Sugar: Adds sweetness to the batter.
• Baking Powder: A leavening agent that helps the pastry rise.
• Baking Soda: Works alongside baking powder for a lighter texture.
• Salt: Enhances the overall flavor of the batter.
• Egg: Binds the ingredients together and contributes to the texture.
• Whole Milk: Adds richness and moisture to the batter.
• Vegetable Oil: Keeps the pastry light and fluffy.
• Vanilla Extract: Infuses the batter with a touch of warmth and flavor.
• Filling: The best part! Red bean paste, Nutella, vanilla custard, or cheese are all great options.
Alternative Ingredient Suggestions
You can easily customize this recipe based on dietary needs or ingredient availability:
• All-purpose flour: If you don’t have cake flour, all-purpose flour can be substituted for a sturdier texture.
• Buttermilk: For a richer flavor, swap whole milk with buttermilk.
• Butter: Use butter instead of vegetable oil for a more decadent taste.
• Flavor Extracts: Want to experiment with flavors? Add matcha, ube, or pandan extract for a unique twist.
How to Make Taiyaki: Step-by-Step Instructions
- Sift the dry ingredients: In a large mixing bowl, sift the cake flour, granulated sugar, baking powder, baking soda, and salt. Whisk them together and set aside.
- Combine the wet ingredients: In another bowl, whisk together the egg, milk, vegetable oil, and vanilla extract.
- Mix the wet and dry ingredients: Pour the wet mixture into the dry ingredients. Whisk until just combined, leaving a few lumps. Cover the batter and refrigerate for at least 1 hour.
- Prepare the taiyaki pan: Preheat the taiyaki pan over medium-low heat. Brush both sides of the mold with a neutral oil and gently wipe away any excess oil with a paper towel.
- Fill the taiyaki pan: Stir the batter and pour it into the preheated mold, filling it about 60% full. Leave the fishtail empty.
- Add the filling: Place your chosen filling (e.g., red bean paste or Nutella) into the center of the fish mold. For ease, use a piping bag.
- Cover the filling: Pour more batter over the filling, filling up the fishtail. Close the mold and flip it over to ensure the batter spreads evenly.
- Cook and cool: Cook for 2-3 minutes on each side, until golden brown. Once done, remove the taiyaki and let it cool on a rack. Repeat with the remaining batter. Enjoy immediately when warm.
Tips for the Best Taiyaki
- Do not over-mix: The batter should have a few clumps to achieve a fluffy interior. Over-mixing will result in a dense texture.
- Rest the batter: Allow the batter to rest for an hour in the fridge to relax the gluten, making the pastry softer and fluffier.
- Preheat the taiyaki pan: Always preheat the pan before adding batter to get the signature crispy exterior.
- Be cautious with batter quantity: Don’t overfill the mold. The batter will spread and puff up as it cooks, and any excess can be trimmed with scissors.
- Practice makes perfect: It might take a few tries to get the right temperature and timing, but don’t worry—it’s all part of the fun!
Pairing Ideas and Variations
While Taiyaki is delightful on its own, you can take it to the next level with a few additions:
- Toppings: Drizzle with chocolate syrup, sprinkle powdered sugar, or add a scoop of ice cream for an indulgent treat.
- Side dishes: Pair with a cup of green tea or a light salad to balance the sweetness.
- Make it spicy: Add a hint of wasabi or spicy miso to the filling for a savory variation.
Storing Taiyaki
Taiyaki is best enjoyed immediately when it’s still warm. If you have leftovers, store them in an airtight container for up to 3 days in the refrigerator. To reheat, simply place them in an oven or toaster oven to restore their crispy texture. Alternatively, Taiyaki can be frozen for up to 3 months. Just wrap each piece individually and store them in the freezer. When ready to enjoy, thaw them overnight in the refrigerator before reheating.
Conclusion
Taiyaki is not just a dessert; it’s a fun, versatile, and delicious treat that brings the spirit of Japan into your kitchen. Whether you’re new to Japanese pastries or a seasoned baker, this simple yet flavorful recipe is sure to be a hit. With endless filling options and a satisfying mix of crispy and soft textures, Taiyaki offers a delightful experience for both the eyes and the taste buds. Now that you know how to make this iconic fish-shaped dessert, you can experiment with different fillings and toppings to make each batch unique. Gather your ingredients, follow the easy steps, and enjoy Taiyaki fresh and warm for an unforgettable snack.
Frequently Asked Questions (FAQs)
What is the best filling for Taiyaki?
The most traditional fillings for Taiyaki are red bean paste and vanilla custard, but you can get creative! Nutella, chocolate ganache, cheese, and sweet potato also make for delicious fillings. You can even try matcha or ube for a unique twist.
Can I make Taiyaki in advance?
Taiyaki is best served fresh and warm, but if you have leftovers, you can store them in an airtight container for up to 3 days in the fridge. To reheat, place them in a toaster oven or regular oven to restore their crispy texture.
Can I make Taiyaki without a special mold?
While the traditional fish shape requires a Taiyaki pan, you can use any waffle or pancake mold as an alternative. The shape may not be the same, but the flavor and texture will still be delightful!
More Relevant Recipes
Print
Taiyaki:
- Prep Time: 5 minutes
- Cook Time: 25 minutes
- Total Time: 1 hour 30 minutes
- Yield: 8 servings 1x
- Category: Dessert
- Method: Baking
- Cuisine: Japanese
- Diet: Vegetarian
Description
Taiyaki is a beloved Japanese street food that is crispy on the outside and soft on the inside. This warm, fish-shaped cake is traditionally filled with sweet fillings like red bean paste, custard, or Nutella. It’s the perfect treat to enjoy at home, with endless variations and a fun presentation.
Ingredients
- 1 ¼ cup (150 g) cake flour
- ¼ cup (50 g) granulated sugar
- 1 teaspoon (5 g) baking powder
- 1 teaspoon (5 g) baking soda
- ¼ teaspoon salt
- 1 large egg
- ¾ cup whole milk
- 1 tablespoon (15 g) vegetable oil
- ½ teaspoon vanilla extract
- ¾ cup filling (red bean paste, Nutella, custard, or cheese)
Instructions
- Sift the dry ingredients: In a large mixing bowl, sift the cake flour, granulated sugar, baking powder, baking soda, and salt. Whisk them together and set aside.
- Combine the wet ingredients: In another bowl, whisk together the egg, milk, vegetable oil, and vanilla extract.
- Mix the wet and dry ingredients: Pour the wet mixture into the dry ingredients. Whisk until just combined, leaving a few lumps. Cover the batter and refrigerate for at least 1 hour.
- Prepare the taiyaki pan: Preheat the taiyaki pan over medium-low heat. Brush both sides of the mold with a neutral oil and gently wipe away any excess oil with a paper towel.
- Fill the taiyaki pan: Stir the batter and pour it into the preheated mold, filling it about 60% full. Leave the fishtail empty.
- Add the filling: Place your chosen filling (e.g., red bean paste or Nutella) into the center of the fish mold. For ease, use a piping bag.
- Cover the filling: Pour more batter over the filling, filling up the fishtail. Close the mold and flip it over to ensure the batter spreads evenly.
- Cook and cool: Cook for 2-3 minutes on each side, until golden brown. Once done, remove the taiyaki and let it cool on a rack. Repeat with the remaining batter. Enjoy immediately when warm.
Notes
- Do not over-mix! The batter should have a few clumps to achieve a fluffy interior. Over-mixing will result in a dense texture.
- Rest the batter for an hour in the fridge to relax the gluten, making the pastry softer and fluffier.
- Preheat the taiyaki pan for a crispy exterior and adjust the heat accordingly.
- Be cautious with the batter quantity—don’t overfill the mold.
- Practice makes perfect! It may take a few tries to get the right temperature and timing, but it’s part of the fun.
Nutrition
- Serving Size: 1 piece
- Calories: 162 kcal
- Sugar: 11 g
- Sodium: 295 mg
- Fat: 3 g
- Saturated Fat: 1 g
- Unsaturated Fat: 2 g
- Trans Fat: 0.01 g
- Carbohydrates: 29 g
- Fiber: 1 g
- Protein: 4 g
- Cholesterol: 23 mg