Halloween is just around the corner, and what better way to indulge your spooky cravings than with Vampire Bite Halloween Cupcakes? These delicious treats not only look eerily stunning but also pack a punch of flavor with a rich red velvet base, creamy filling, and the perfect touch of “blood” to make them the centerpiece of your Halloween party. Whether you’re hosting a haunted house or simply looking for a fun activity to do with friends and family, these cupcakes are sure to wow your guests.
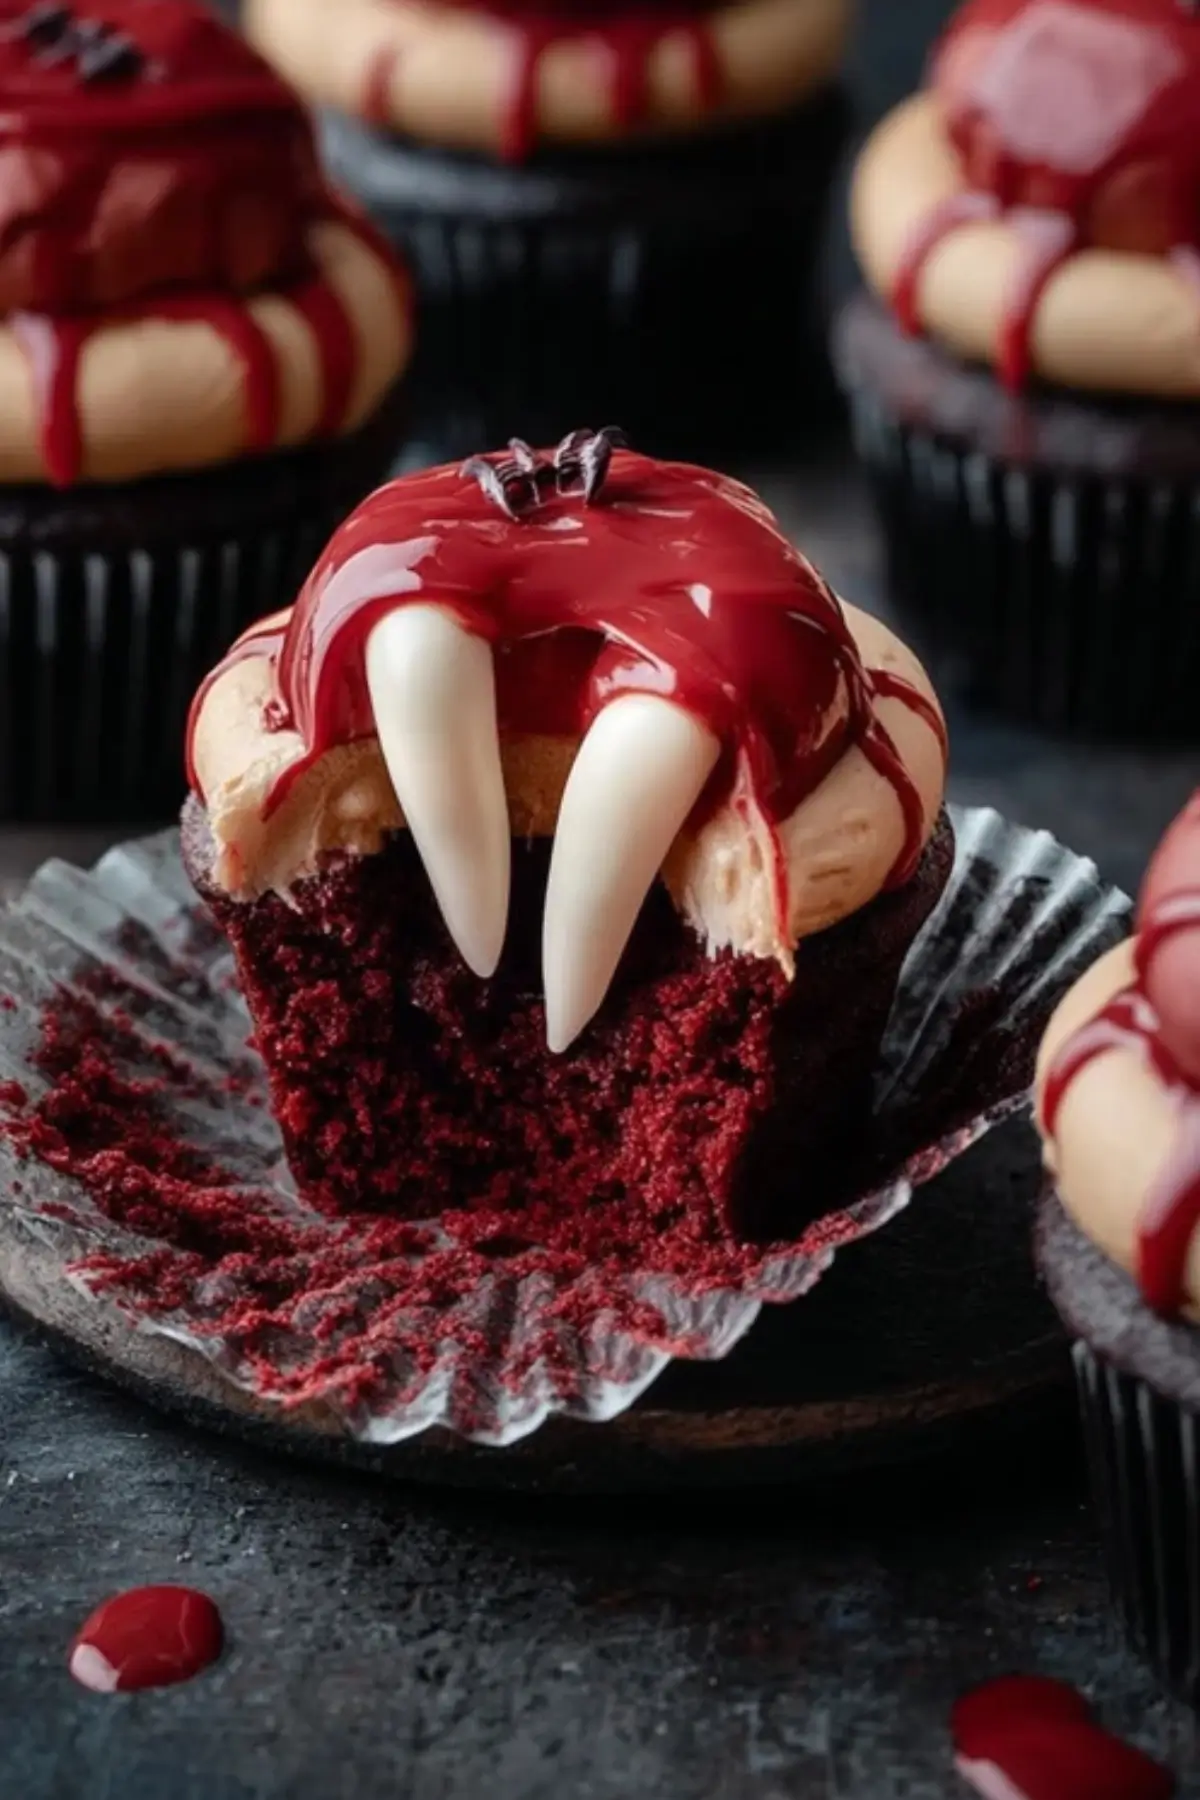
Table of Contents
Why These Vampire Bite Cupcakes Are a Must-Try
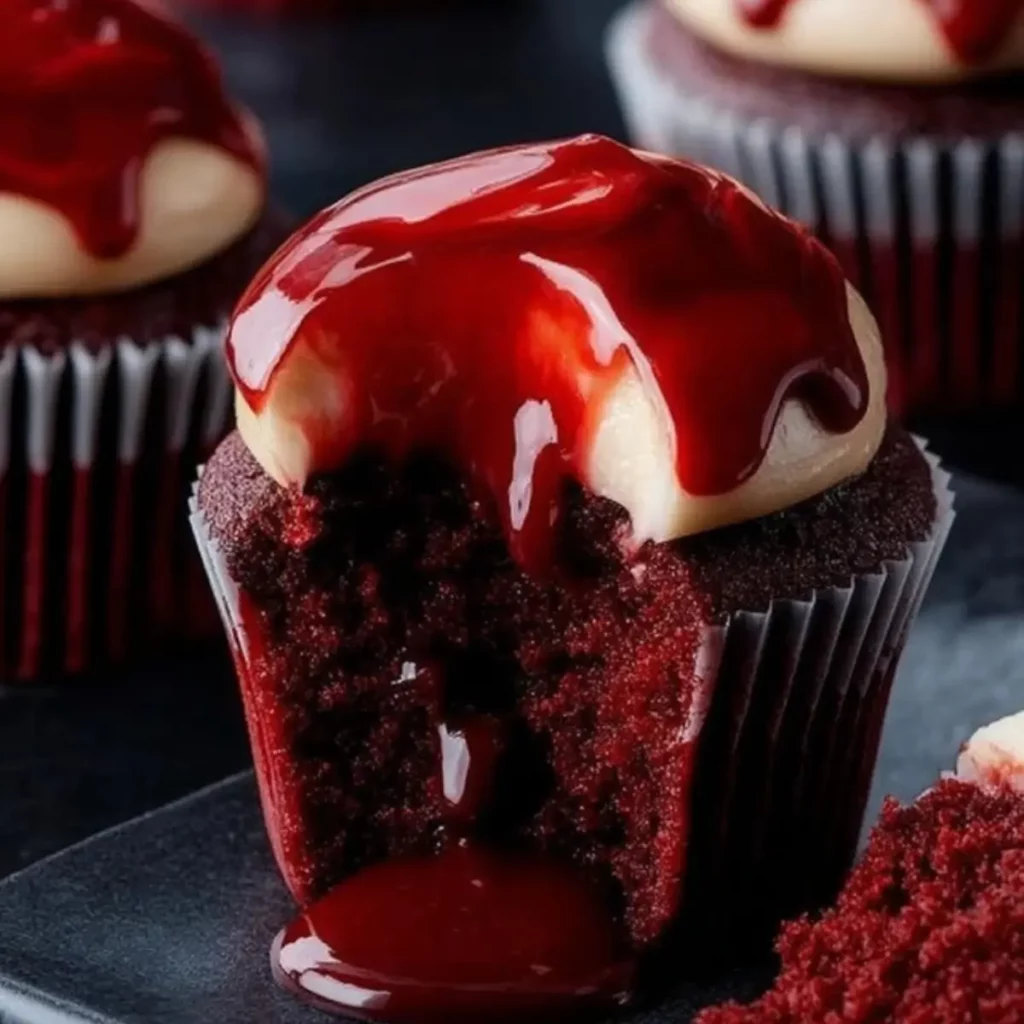
If you’re looking for a show-stopping dessert, these Vampire Bite Halloween Cupcakes are the ultimate choice. Combining the rich, velvety flavor of red velvet cupcakes with a creepy, realistic design, these cupcakes will quickly become the star of your Halloween spread. They’re not only delicious but also offer a visual treat, with the surprise of a “blood”-filled interior and pale, skin-toned buttercream frosting that looks like it came straight from a vampire’s lair.
Perfect for kids and adults alike, these cupcakes are easy to make, fun to decorate, and sure to leave a lasting impression on your guests. Plus, the playful yet spooky vibe they bring makes them ideal for Halloween-themed parties.
Ingredients for Vampire Bite Halloween Cupcakes
Here’s what you’ll need to create these blood-curdling cupcakes:
- All-purpose flour: Forms the base of the cupcakes.
- Granulated sugar: Adds sweetness and moisture to the cupcakes.
- Unsalted butter: Contributes to the soft texture and flavor.
- Eggs: Provide structure and stability to the cupcakes.
- Buttermilk: Ensures the cupcakes are moist and tender.
- Cocoa powder: Gives the cupcakes their rich chocolate flavor.
- Red food coloring (gel-based): Provides the iconic red velvet color.
- Vanilla extract: Adds a touch of flavor to balance the richness.
- Baking soda: Helps the cupcakes rise to perfection.
- White vinegar: Reacts with the baking soda to create fluffiness.
- Salt: Enhances the overall flavor.
Creamy Red Velvet Filling Ingredients
- Red velvet cake crumbs: These come from the center of the cupcakes and give the filling texture.
- Sweetened condensed milk: Adds a creamy and slightly sweet consistency to the filling.
- Unsalted butter: Used to give the filling a rich texture.
- Red food coloring: Provides a vibrant “blood” effect.
Pale Skin-Tone Buttercream Frosting
- Unsalted butter: The base for a smooth, creamy frosting.
- Powdered sugar: Sweetens the frosting and provides structure.
- Milk or heavy cream: Helps achieve the perfect spreadable consistency.
- Ivory or peach food coloring: Used to create a skin-toned hue for the frosting.
Vampire Bite Decoration
- Candy fangs: Used to create the look of bite marks.
- Red syrup or edible red gel: Creates the “blood” effect.
- Red straws (optional): Adds a dramatic touch of blood dripping from the cupcakes.
Alternative Ingredient Suggestions
If you’re looking for alternatives, here are a few options:
- Gluten-free flour: Use this if you need to make these cupcakes gluten-free.
- Dairy-free butter: Swap for a dairy-free option if needed.
- Almond milk: A non-dairy milk substitute if you want to make the recipe vegan-friendly.
Step-by-Step Instructions for Vampire Bite Halloween Cupcakes
Follow these simple steps to create your spooky cupcakes:
- Preheat the oven and prepare the muffin tin: Set your oven to 350°F (175°C) and line a 12-cup muffin tin with paper liners.
- Mix the batter: In a large bowl, cream together the butter and sugar until fluffy. Add the eggs, one at a time, followed by the vanilla extract and red food coloring. Mix in the flour, cocoa powder, salt, and buttermilk until just combined. Stir in the baking soda and vinegar mixture.
- Bake the cupcakes: Spoon the batter into the muffin tin, filling each cup about two-thirds full. Bake for 18-20 minutes, or until a toothpick inserted into the center comes out clean.
- Prepare the red velvet filling: In a small bowl, mix the cake crumbs with sweetened condensed milk, butter, and red food coloring to achieve a glossy, vibrant red filling.
- Hollow out the cupcakes: Once the cupcakes are completely cooled, use a cupcake corer or small knife to remove the centers and fill with the creamy red velvet filling.
- Make the buttercream frosting: Beat softened butter until creamy, then gradually add powdered sugar. Add milk or cream to reach a smooth, spreadable consistency, and mix in the food coloring until you achieve the desired pale, skin-tone color.
- Frost the cupcakes: Frost each cupcake with a smooth layer of buttercream, creating a flawless, skin-like finish.
- Decorate with vampire bite marks: Use candy fangs to create bite marks on the cupcakes and drizzle red syrup or edible red gel for a blood-like effect. Add red straws if desired for an extra spooky touch.
Tips & Tricks for Perfect Vampire Bite Cupcakes
To make sure your cupcakes turn out perfectly, keep these tips in mind:
- Let the cupcakes cool completely: This ensures a smooth frosting application.
- Smooth buttercream: For the smoothest finish, refrigerate the frosted cupcakes for a few minutes before decorating.
- Adjust the consistency of the filling: If the red velvet filling is too thick, add more sweetened condensed milk until it reaches the perfect consistency.
- Be careful with food coloring: Always add the food coloring gradually to avoid overly vibrant colors.
Pairing Ideas and Variations for Vampire Bite Halloween Cupcakes
These cupcakes are perfect on their own, but they also pair wonderfully with Halloween-themed drinks and treats:
- Serve with blood-red punch: A fruity, red beverage will enhance the vampire theme.
- Try a dark chocolate drink: A rich, dark chocolate drink complements the red velvet cupcakes beautifully.
- Add a spooky touch: Place your cupcakes on a black platter with plastic bats, cobwebs, or even dry ice for an eerie effect.
Storing and Freezing Vampire Bite Halloween Cupcakes
- Storing: Keep your decorated cupcakes in an airtight container at room temperature for up to 2 days or in the refrigerator for up to 5 days.
- Freezing: You can freeze the unfrosted cupcakes. Just be sure to let them cool completely before wrapping them tightly.
These Vampire Bite Halloween Cupcakes are a fun, spooky, and delicious way to celebrate Halloween with friends and family. The rich red velvet, creamy filling, and eerie decorations make them the perfect centerpiece for any Halloween party. Enjoy the chillingly delicious treat and have a spooky Halloween!
Conclusion: Delightful and Spooky Vampire Bite Halloween Cupcakes
In conclusion, these Vampire Bite Halloween Cupcakes are the perfect blend of spooky and delicious. With their rich red velvet base, creamy, vibrant red filling, and dramatic “blood” drips, they’ll add both flavor and flair to your Halloween celebrations. Whether you’re a novice baker or an experienced dessert enthusiast, this recipe offers a fun and creative way to impress your guests with minimal effort. With a perfect balance of sweetness and a creepy aesthetic, these cupcakes are guaranteed to be the highlight of your Halloween spread. So, roll up your sleeves, get your vampire fangs ready, and enjoy making these spooky treats!
Frequently Asked Questions (FAQ)
Can I make Vampire Bite Halloween Cupcakes ahead of time?
Yes, you can definitely make these cupcakes ahead of time. You can bake the cupcakes and prepare the filling a day in advance. Just be sure to frost and decorate them on the day you plan to serve them to maintain their fresh, spooky appeal.
What if I don’t have a cupcake corer for removing the centers?
No worries! If you don’t have a cupcake corer, a small knife or even a melon baller will do the trick. Just be gentle when removing the cupcake centers to avoid cracking them.
How do I store the decorated Vampire Bite Halloween Cupcakes?
Store the decorated cupcakes in an airtight container at room temperature for up to 2 days, or in the refrigerator for up to 5 days. Allow them to come to room temperature before serving for the best flavor and texture.
More Relevant Recipes
Print
Vampire Bite Halloween Cupcakes:
- Prep Time: 30 minutes
- Cook Time: 20 minutes
- Total Time: 50 minutes
- Yield: 12 cupcakes 1x
- Category: Cupcakes, Halloween
- Method: Baking
- Cuisine: American
- Diet: Vegetarian
Description
These Vampire Bite Halloween Cupcakes are a spooky and delicious treat perfect for Halloween. With a rich red velvet base, a creamy red velvet filling that spills out when bitten, and pale, skin-tone buttercream frosting, these cupcakes are both visually striking and incredibly flavorful. They are guaranteed to be the highlight of your Halloween celebration, with a touch of eerie ‘blood’ for that creepy, fun factor.
Ingredients
- 1 1/2 cups all-purpose flour
- 1 cup granulated sugar
- 1/2 cup unsalted butter, softened
- 2 large eggs
- 1/2 cup buttermilk
- 2 tbsp cocoa powder
- 1 tbsp red food coloring (gel-based)
- 1 tsp vanilla extract
- 1/2 tsp baking soda
- 1 tsp white vinegar
- 1/4 tsp salt
- 1/2 cup red velvet cake crumbs
- 1/3 cup sweetened condensed milk
- 1 tbsp unsalted butter, melted
- 1–2 tbsp red food coloring (for filling)
- 1 cup unsalted butter, softened (for frosting)
- 3–4 cups powdered sugar, sifted
- 2–3 tbsp milk or heavy cream
- A few drops of ivory or peach food coloring (for frosting)
- 1 tsp vanilla extract (for frosting)
- Candy fangs or small dots of red gelatin
- Red syrup or edible red gel
- Red straws (optional)
Instructions
- Preheat your oven to 350°F (175°C) and line a 12-cup muffin tin with paper liners.
- Cream together the butter and sugar until fluffy. Add eggs, vanilla, and red food coloring. Mix until combined.
- In a separate bowl, whisk together the flour, cocoa powder, and salt. Gradually add the dry ingredients to the wet ingredients, alternating with buttermilk, until just combined.
- Stir in the baking soda and vinegar mixture. Spoon the batter into the muffin tin, filling each cup about two-thirds full.
- Bake for 18-20 minutes or until a toothpick comes out clean. Let the cupcakes cool for 5 minutes before transferring them to a wire rack to cool completely.
- To prepare the filling, mix the red velvet cake crumbs with sweetened condensed milk, melted butter, and red food coloring. Stir until smooth and slightly glossy.
- Once the cupcakes are cool, use a small knife or corer to remove the centers. Fill each hole with the creamy red velvet filling.
- To make the frosting, beat softened butter and powdered sugar until smooth. Add milk or cream until the frosting reaches a spreadable consistency, then add food coloring to create a skin-tone color.
- Frost each cupcake with the buttercream, smoothing it to resemble skin.
- Create bite marks with candy fangs or small drops of red gelatin. Drizzle red syrup or edible gel from the puncture marks.
- For extra drama, place red straws near the cupcakes for a blood-dripping effect.
Notes
- Allow the cupcakes to cool completely before frosting to ensure smooth application.
- For smoother frosting, refrigerate the cupcakes briefly before decorating.
- If the filling is too thick, add more sweetened condensed milk to adjust the consistency.
- Use gel food coloring for vibrant hues without affecting the texture of your batter or frosting.
Nutrition
- Serving Size: 1 cupcake
- Calories: 390
- Sugar: 42g
- Sodium: 180mg
- Fat: 18g
- Saturated Fat: 11g
- Unsaturated Fat: 7g
- Trans Fat: 0g
- Carbohydrates: 53g
- Fiber: 1g
- Protein: 4g
- Cholesterol: 75mg